Sunday, December 29, 2019

Thank You and Happy New Year!

I would like to personally thank you for spending time with me here every month. Your kind words, comments, support and feedback encourage me to continue sharing my lifetime food journey and gardening experience.

From our household to yours, I wish you a Happy New Year as we enter a new decade ... with all the best 2020 will bring!

Billie and Portia 2019

So, until next year ... Happy New Year, Joyful Cooking and Bon Appétit!
... Sally Rae

Photo by Sally Rae

Saturday, December 21, 2019

Last Denman Market of the Year

The sun came out this morning for a crisp, beautiful day at the final Denman Island Farmer's Market of 2019. I was in search of fresh, organic vegetables, both for meals and to stock my freezer with soups. I came home beaming, with so much more than I imagined!!

I have written previous posts about our incredible Denman Island Market and the dedicated local Farmers. Through sunshine, rain and yes... even snow, the tents and tables are set up, ready to 'feed Denman'! We do live in a very special place on Earth!

The Denman Island Market ~ December 21st, 2019
Naomi of Orkney Farms had some crazy huge parsnips that are destined for an amazing Curried Parsnip soup for the freezer. Also from Naomi, a package of Orkney Farms ground beef and a small, perfect red cabbage. The next stop was to visit Kate at Denman Island Heritage Apples for her Traditional and Blackberry infused Apple Cider Vinegar. I'm going to compare them both separately in my previous recipe for Marinated Vegetable Salad
Paleo Veg Marinade 
 with Blackberry infused
Apple Cider Vinegar
Then moving on... to stand in the (always long) line for Two Roads Farm. According to Sam, the last of the carrots and the Farm Stand will be open until Christmas Eve, then closed for the season. Also from Sam; fresh Brussels sprouts, a rutabaga, a few small white onions (I only grew red this year), a bunch of each red and golden beets. Jenny was there with beautiful jars of ready to heat-and-eat soups, her assortment of pepper condiments and soaps too.
Incredible Denman Market shopping spree in December! 
Tracy from Ruby Slipper Ranch had fresh turkey parts again. I'm not a fan of white meat and a turkey is just too big for two. Last year we really enjoyed the fresh turkey legs, so this Christmas we'll have that again... cooked in the Romertopf clay baker in the oven. Fresh eggs came from Pat of Corlan Vineyard and Farm... and don't forget to try her warm baked blueberry coffee cake and fabulous coffee to warm you up!! Cheryl was also at the Market with her organic chocolate delights, unfortunately the 'turtles' were no where in sight... long sold out! 
Fluorite, Rose Quartz and Black Tourmaline

I have brought home rocks, stones and pretty pebbles since I was a kid. I couldn't resist browsing the table of beautiful colored rocks and amethyst geodes. Yup, I came home with two incredible specimens to add to my collection and adorn my window sills. The 'Fluorite' slice, with its multi colored layers almost looks edible! The photo does not do it justice... When I picked up the chunk of 'Black Tourmaline' it just felt right in my hand, and the beautiful 'Rose Quartz' is eye candy. 

To top off the shopping, it was a relaxed, social day of visiting and chatting with friends and clients. I'm sorry for anyone who missed this amazing day at the Market on Denman. Mark your calendars for next year, it is an event you won't want to miss! We are so fortunate to have the incredible variety of fresh, local, organic food available into December! 

I extend deep gratitude and a huge Thank You to all the vendors and farmers today ... thank you for your hard work, long hours and dedication to feeding Denman throughout the year, allowing us to shop local and eat fresh!!

Until next time... Season's Greetings, Happy Holidays and Bon Appétit!
Happy Winter Solstice, Merry Christmas, Happy Hanukkah, Happy New Year ...

Photos by Sally Rae

Monday, December 16, 2019

Paleo Marinade for Vegetables

A basic guideline for Paleo style, clean eating is ... "eat whole foods, organic as much as possible and avoid processed foods ... if it looks like it was made in a factory, don't eat it!" 

Before changing to the Paleo diet, a bottle of my 'Bean Salad Marinade' (from For the Love of Food, page 156) was a staple in my fridge. Any leftover vegetables from meals became a quick marinated salad for the next day... whether it was stir fried zucchini, mushrooms and onions, roasted asparagus or steamed broccoli, carrots, even Brussels sprouts were tossed in a bowl with some thinly sliced fresh onion and the marinade.

Most of the Bean Salad Marinade ingredients from my original recipe are no longer allowed on my diet so I have been searching for a Paleo version. Last month I found a recipe that I have been adapting to my taste. I have used this marinade on raw vegetables, steamed vegetables and even with cooked sweet potatoes!

Fast and simple ~ Mixed Vegetables or Sweet Potato Salad

It is fast, simple and has numerous flavor variations. Warning this is addictive ... and healthy!! I use red onions because I love the color, but after marinating for 2 days it will turn the cauliflower pink. If that's a game changer for you, add the red onions just hours before serving or use sweet white onions instead. 
This is a make ahead salad. For the best flavor, allow the salad to marinate at least overnight, stirring occasionally... I let it marinade for two days before serving. You can use any variety of vegetables.


Here are a few suggestions for variety and whether to pre-cook or use them raw...
 ~raw florets of broccoli and cauliflower
 ~raw celery, sliced on the diagonal
 ~raw small zucchini, cut into coins
 ~raw red or sweet white onions, julienne, sliced thin 
 ~raw Sugar Snap peas, tips removed and cut diagonally into 2-3 pieces
 ~raw bell peppers in every color **only if you can tolerate nightshades
 ~raw or lightly steamed carrot slices
 ~steamed Brussels sprouts, cut in halves or quarters
 ~roasted asparagus, cut into bite sized pieces
 ~cooked golden beets, skin removed and diced 

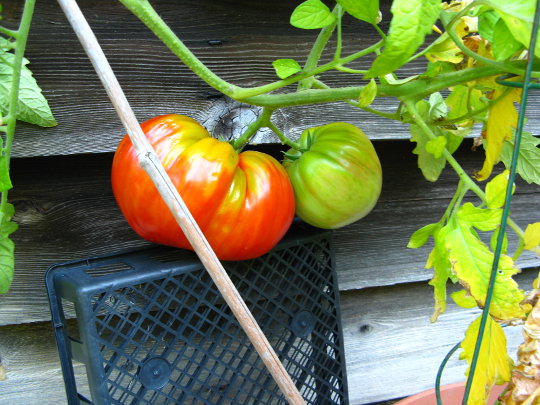
Remember, always try to eat in season and choose organic when possible. Your local Farmer's Market is the ideal place to shop!


PALEO VEGETABLE SALAD MARINADE        Yield: about 2 cups
Marinated Raw Mixed Vegetables

    Keep a bottle of this basic marinade as a staple in your fridge!
The Basic Marinade:
1 cup apple cider vinegar
1/3 cup honey
1/2 cup avocado oil
1 tsp. granulated garlic
1 tsp. onion powder
1 tsp. Celtic Sea Salt
Flavor Options:
**Season the above Basic Marinade with your choice of the following;
   1 Tbsp. finely minced fresh dill weed 
   or 1/2 Tbsp. dried dill weed
   or 2 tsp. crushed dried thyme + 1 tsp. crushed dried sweet marjoram
   or 2 Tbsp. sulfate free grainy mustard + 1 tsp. dried dill weed 

In a 2 cup jar or shaker bottle, measure and add all the 'Basic Marinade' ingredients. Add your desired 'Flavor Options', shake well, label with the date and store in the fridge. 

For a 'Marinated Vegetable Salad': prepare 8-10 cups of vegetables and toss with a full recipe of Marinade. Serves 8-10

For a 'Sweet Potato Salad': Cook, cool, peel and dice 2 jumbo, orange sweet potatoes. Finely dice 1/4 cup each celery and red onions. Gently mix sweet potatoes, onion and celery with 1/2 cup or more of the Marinade. **Note: the grainy mustard option is fabulous with this one! Serves 6-8 

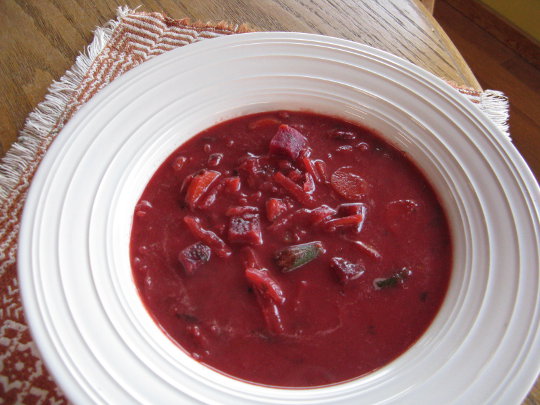
For a 'Red Beet Salad': Cook, cool, peel and julienne or slice red beets, toss with red or green thinly sliced cabbage and thinly sliced red onions. This one is messy but delicious!!

Any of these salad ideas are a welcome addition to a potluck any time of the year. With the busy holiday season approaching, take advantage of a make ahead, healthy dish to share with friends and family. 

Until next time... Happy Holidays and Bon Appétit! 

Recipe Ideas by Sally Rae
Photos by Sally Rae
Inspiration from Lichen Paleo, Loving AIP 

Sunday, December 1, 2019

Homemade Gifts From Your Kitchen

The thought, time and effort involved in homemade gifts from your kitchen show you care, and are gifted with love. 

One of my favorite standby gifts any time of year, is Caramel Nut Popcorn... it is a much appreciated treat at my house compared to the store bought versions! It can be made with or without nuts... if using nuts try; peanuts, a fancy nut mix or specific nuts that are favorites.
Caramel Nut Popcorn
Cellophane food grade bags can be found at Craft Supply Stores and sometimes Dollar Stores. With the addition of a personalized label and fancy twist tie or ribbon, it makes a thoughtful parting gift to dinner guests, stocking stuffer or ... package the whole recipe in a one gallon fancy container for that 'big kid' in your household! (No names mentioned!!) With 14 cups of popcorn and nuts, this recipe makes quite a few small gift bags, so it goes a long way.

At the other end of the homemade 'foodie gift' spectrum is the elegant French Macaron. Make these sweet little gems for a very special gift. They are time consuming and a bit fussy but oh so elegant! 
Elegant French Macarons


Hand dipped Chocolate Truffles
Gingerbread Boys, Girls and Reindeer
For a quick, easy and decadent gift try Chocolate Nut Bark for the chocoholics on your list. Chocolate Bark satisfies the cravings without the time and labor intensity involved in making hand dipped Chocolate Truffles.

If you are an avid baker, a fancy assortment of festive cookies and squares packaged in a pretty tin make a tasty, caring gift. 

Asst. Pickles and Pickled Quail Eggs
On the savory side, small jars of homemade fermented pickles, pickled eggs (think tiny quail or Bantam hen eggs) or even sauerkraut are great gifts but please be sure the recipient knows these gifts must be kept in the fridge at all times!! 

If you are a gardener, gift a small braid of your home grown garlic adorned with dried herbs or flowers and a pretty ribbon. Or an assortment of fruit jams, vinaigrette or condiments prepared from your garden produce.
How about a fancy bottle of Homemade Liqueur ... or my cookbook 'For the Love of Food'? There are links to my Blog recipes offered on most of these suggestions above, just hover over them and click.

I hope these suggestions have your creative juices flowing. To get you started, a recipe from my cookbook 'For the Love of Food', enjoy my Caramel Nut Popcorn!

CARAMEL NUT POPCORN           Yield:  About 14 cups
Fill colorful tins or cellophane bags with this treat for an inexpensive holiday gift that both kids and adults will enjoy receiving.

12 cups popped popcorn
2 cups mixed nuts or peanuts
1 cup packed brown sugar
½ cup corn syrup
½ cup butter
½ tsp. sea salt
½ tsp. pure vanilla extract
½ tsp. baking soda
Without stirring, boil 5 minutes

Spray a large roasting pan with non-stick cooking spray. Combine popcorn and nuts in pan; place in a 250°F oven while preparing the glaze. In a saucepan combine brown sugar, corn syrup, butter and salt. Stirring constantly bring to a boil over medium heat. Without stirring, boil 5 minutes.

 
Break apart and cool on bake sheets
Remove from heat, stir in vanilla and baking soda. Pour over popcorn and nuts; stir to coat well. Place in pre-heated oven 60 minutes, stirring occasionally (every 20 minutes works well).

When done, remove from the oven and divide the mixture onto 2 non-stick bake sheets with sides. Quickly break apart or into chunks while warm. Allow to cool. Store in tightly covered container. 

Until next time... Have fun in your kitchen ... and Bon Appétit! 

Photos by Sally Rae 
Recipes by Sally Rae

Thursday, November 21, 2019

Low-Carb 'Seedy Crackers'

Changing to a Low-Carb, Keto or Paleo Diet presents plenty of food omissions, challenges and a lifestyle overhaul. Bread and crackers are difficult to replicate without the use of grains. Confronted with avoiding nuts and nut meal creates another difficulty, besides the fact that nut meal and flours produce a buttery, rich flavor to baked breads, crackers, pancakes, cookies etc.

Finding a crispy, delicious cracker is solved with these egg free, nut free, grain free, gluten free, crunchy, 'Low-Carb 'Seedy Crackers'. They are a bit delicate, not suitable for heavy dips but give them a try in softer dips and enjoy the crunch and flavor! They are fast and super easy to prepare and will be gobbled up quickly. The crunch factor is very satisfying and they are tasty. What more can one ask for?

The great benefit of making your food from scratch is to adjust recipes for your dietary needs. *Instead of ground flax meal you can substitute flax seeds or pulse the whole flax seed in a blender or coffee grinder. Ground flax provides a higher level of nutritional value than the whole seed. You can also adjust the salt to your taste. I use 1 tsp. of Celtic Sea Salt because I like the salty flavor. The salt can be reduced to 1/2 tsp. or no salt at all.

Low-Carb 'Seedy Crackers'
Completely cool and break into pieces

1 cup sunflower seeds
1/2 cup hemp hearts
1/3 cup pumpkin seeds
1/3 cup sesame seeds
*1/4 cup flax seeds
*1/4 cup ground flax meal
1+1/2 Tbsp. psyllium husk powder
1 tsp. sea salt
1 Tbsp. avocado oil
1+1/2 cups boiling water

Instructions: 
Heat oven to 350F. Line two 18"x13" jelly roll sheet pans with parchment paper or silicone mats to prevent the mixture from sticking.

Into a large mixing bowl, pour all the seeds, psyllium husk powder and salt. Gently mix well with a whisk. Add the oil and boiling water. Stir gently with a whisk until well combined and the mixture starts to thicken. Let it rest for a few minutes in the bowl, this gives the psyllium a chance to gel.
 

Divide mixture and spread thinly
Once the mixture has gelled, divide it between the two prepared pans and spread it as thinly and evenly as you can on the parchment. I use a silicone spatula to spread it in a back and forth motion, almost like icing a cake. If using your hands, have a small bowl of water to dip your fingers into from time to time to reduce the sticky factor.

Place in the oven and set the timer to 30 minutes. When the timer goes off, remove the pans and using a pizza cutter or a sharp knife, score the mixture into cracker shapes, if desired. Put them back in the oven and set the timer for another 10-15 minutes. Your crackers will likely take between 45 mins – 60 minutes to crisp up depending on the thickness. Seeds burn easily so you will have to watch them after the timer goes off. You can remove outer edges if they are done and return the center, uncooked parts to the oven. You’re aiming for crisp crackers but keep in mind they continue to cook a little when you get them out of the oven.
 

Store in a 2-quart sealer
Once they’re done and completely cooled, remove from the parchment and break along the scored lines or just break into pieces. Gently put them in a sealed container and enjoy!

Notes:
  • It’s important that you have the right amount of psyllium husk powder. This is what forms the gel and that is what allows it to turn into a nice cracker.
  • Make sure to pat out the mixture as thin as you can. Not only will it speed up the cooking process, but it also makes it more likely to get crispy, which is exactly what we want.
  • Make sure to give it plenty of time to crisp up after it is done baking. No gobbling it while it’s still hot!
  • Though you can use whatever seeds you like, it’s important that you use seeds are on the small side, like sesame seeds, hemp seeds, and things like that.
  • These will keep for about a week or two (if they last that long!) when stored in a 2-quart sealer.
Soup and Low-Carb Seedy Crackers


Until next time... Bon Appétit!

Recipe by Sally Rae
Photos by Sally Rae 

Thursday, October 10, 2019

Putting the Garden To Bed and Harvest Recipe

The garden is 'put to bed'
Fall is in the air... the evenings are cool and there are patches of frost in the yard come morning. The garlic is planted and mulched with my new experiment of using a compressed, chopped straw bale.  It is the beautiful golden colored mulch on the back bed, second from the left. Another experiment was to amend my garden soil with the addition of local horse manure on top of all the beds without winter crops. Once the rains wet the manure and soil, these beds will be covered with black plastic through the winter, then turned over in the Spring before planting. The carrots are still covered with Remay to protect from carrot rust flies, and will remain that way until the end of October. The strawberries have been cut down and mulched with the new chopped straw at ground level then a light layer of maple leaves. The winter cabbage and kale have been mulched and the large Lennox cabbages that were planted earlier have been picked. The largest weighing in at almost nine pounds... that's a lot of cabbage!!
Lennox Organic Cabbage
I have covered the garden walk ways with cardboard to keep the weeds down. Our climate is warm enough to keep some weeds growing almost year round. By Spring they can really take off before I start spending time in the garden to keep them under control. I tried this last year and it was great! Once I started working in the garden, I had to just put time into the beds and planting rather than weeding ... my least favorite job anyway. 

Thanksgiving this weekend marks the last big Saturday Market and Apple Fest on Denman Island. I wanted to share a hearty, thick 'Cabbage and Beet Borscht' recipe I've been working on. It makes a big pot and is a great addition to feed a crowd or fill your freezer with individual serving containers for the cold weather that is on its way. If you don't have the ingredients in your garden they will be available through our wonderful, dedicated, local farmers this Saturday. See you at the Market!

BEET AND CABBAGE BORSCHT      Yield: 10-12 servings
This soup is thick with seasonal, hearty vegetables ... it is Paleo friendly and Night-Shade Free.

4-6 fresh beets (about 1-1/2 pounds) unpeeled
1/4 cup red wine vinegar
2 Tbsp. coarse salt
3 Tbsp. coconut oil or ghee
4 stalks celery, thinly sliced crosswise
2 large onions, cut in half, then quarters and thinly sliced
1 leek, cut in half lengthwise then thinly sliced
5 cloves garlic, minced
4-6 carrots, sliced into coins 
1/2 head green cabbage, cored, cut into 1" wedges and shredded
1/2 lb. green beans, tips removed and cut into 1" pieces, optional 
Beet and Cabbage Borscht
4 parsley sprigs, minced
3 tsp. dried thyme leaves
3 bay leaves
3 Tbsp. apple cider vinegar
12 cups beef, chicken or vegetable stock
1/4 cup red wine or balsamic vinegar 
Freshly ground black pepper
2-3 tsp. sea salt
2 Tbsp. minced fresh dill   
Sour cream or Greek yogurt for serving
Red Wine or Balsamic Vinegar for serving 

In a large saucepan, cover the beets with cold water by 1 inch. Stir in 1/4 cup red wine vinegar and 2 Tbsp coarse salt. Bring to a boil, lower the heat and simmer covered, until very tender, about 30 minutes. Drain, cool and slip the skins off the beets. Dice beets and set aside.

Heat the oil in a large stock pot over medium heat. Add the celery, onions, leek, garlic and carrots and cook covered, stirring occasionally until soft, about 8 minutes. Add the cabbage and cook stirring until wilted.

To the pot add beets, beans, minced parsley, thyme, bay leaves, apple cider vinegar and stock. Bring to a boil stirring often, lower heat and simmer covered for 10 minutes to marry the flavors.

Stir in the 1/4 cup of red wine or balsamic vinegar, 2-3 teaspoons salt and season with pepper to taste. Remove about a third of the soup and puree it in a blender, then add back to the pot.

To serve, divide among warm soup bowls, top with dollops of sour cream and a sprinkle of minced dill. Serve with additional vinegar at the table.

Until next time... Happy Thanksgiving and Bon Appétit!


Photos by Sally Rae
Recipe by Sally Rae

Thursday, September 12, 2019

A Ginormous Tomato, Proteknet and Flexzilla in My Garden!

Sally's Outdoor Salsa, heavy on the vine
This weekend has turned to overcast with the odd rain shower. Evenings are already cool and mornings are damp with dew prompting  powdery mildew on leaves. With shorter days the plants are slowing down production. 
Time to wrap it up for Fall and Winter!

The weather was all over the map this summer; very warm early on, then cool, minimal rain, a shorter heat wave than the past few years and thankfully, no smoke from forest fires. The flora and fauna were confused it seemed. 
A record breaking 2 lb. 5-3/4 oz. Sally's Outdoor Salsa!

I did not see many pollinators around and although I planted more flowers than usual, I had to take on the task of hand pollinating the tomatoes, greenhouse cucumbers and winter squash. Through all my efforts, the harvest was not as bountiful as it could have been.

Most of the tomatoes struggled with small fruit or only 2-3 per plant! However, my 'Outdoor Salsa' tomato (that has become quite famous on Denman and sold by Annie as 'Sally's Salsa') produced a record breaking tomato this year tipping the scale at 2 lb. 5-3/4 oz! I have been saving select seed from this unknown, heirloom variety for about 20 years. My goal was and still is, to save from the largest fruit, that have a minimal amount of seeds. 
Sally's Salsa- very few seeds and meaty, perfect to save seed

Therefore I chose the name 'Salsa' because they are very meaty, not juicy or sloppy and make an incredible, thick salsa or tomato sauce. Some years in the beginning, they were completely seedless and I panicked, for fear I would lose my species! That is when I began sharing seed with friends and the 'Denman Seed Savers' ... and my 'Sally's Salsa' variety came to be! 

Winter Squash ~ Sunshine and Butternut
The Sunshine and Butternut winter squash struggled with the on and off again weather, even with hand pollinating. Feeling that my soil needs more nutrients, I now have a manure supplier and the raised vegetable beds will be amended with composted manure ... once it dries off a bit out there. After the beds are topped up with a mixture of new soil and a good dose of manure, they will be covered with heavy black plastic for winter. This will keep the rain from leaching them out over winter, keeps the weeds controlled and promotes the soil to heat earlier in the Spring. 

The winter carrots have been weeded, thinned and are still covered with Remay to keep the carrot rust flies out. According to Linda Gilkeson, the covers must stay in place until the end of October. They are a pain to deal with so I've found a new solution.
Proteknet-100' in a small package

In preparation for next Spring, I have already purchased 100 feet of 'Proteknet' insect netting and 25 pvc hoops through William Dam Seeds. Organic Market Gardens on Denman Island cover all their crops with this amazing material. Providing it is suspended above the crop on (the recommended) pvc hoops, insects cannot penetrate to lay eggs or munch on your plants! It is a synthetic knitted mesh that allows about 89% light transmission and about 60% moisture transmission and allows air to travel through so the plants don't become too hot. It is UV resistant and lasts about 1-3 seasons. I have heard from Veronica of Alveroni Gardens on Denman, that it is also machine washable on the gentle cycle. I'll have photos next year and am looking forward to using the Proteknet insect netting rather than Remay, floating row cover.

My new favorite thing in the garden for 2019!!
Another new purchase for my yard and garden this year was the 'Flexzilla Swivel-Grip Garden Hose' ... what a dream!! Light weight, supple with no spool memory, flexible even in cooler weather and lies flat when in use. The new 'Swivel-Grip' connectors are worth the extra few dollars and make it easy to tighten or loosen the thread fittings at either end and also serve as anti-kink cuffs. A word of caution though when unraveling it from the packaging, it will kink and knot up. I'd suggest especially with the longer hoses, to unravel it carefully when first out of the packaging. 

Most of us still have lots of work to finish outside to wrap it up for the Winter months. I'm thankful for the rain, it has given me a change of pace to get a much delayed Blog Post out!! Also the break from daily watering has been a welcome reprieve. I've spent many hours at the end of my new Flexzilla this summer. I have set aside my garlic seed from this summer's harvest and the red onions are drying in the garage on racks with fans for air circulation. This is just the beginning, still so much to get done, let's hope for some dry September and October weather! 

Until next time... Happy Gardening and Bon Appétit!


Photos by Sally Rae