Thursday, August 20, 2015

It's Panzanella Time!

'Panzanella' is a Tuscan salad of stale bread and tomatoes; dressed with olive oil and vinegar, sometimes onions and basil are added. 
 'Yellow Hawaiian' Heirloom Tomato
This salad is a delicious way to use up a surplus of fresh tomatoes. Also, it's a great addition to a potluck dinner because it does not need to be refrigerated. 

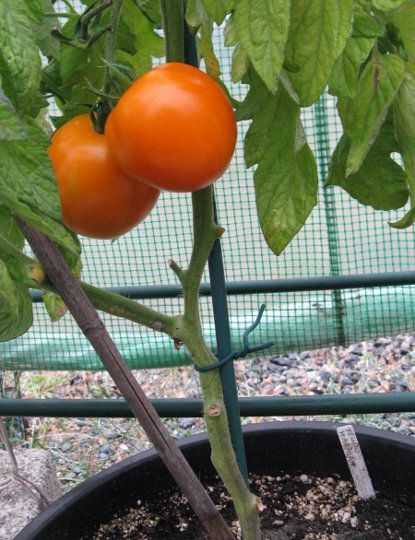
I was at the Denman Island Farmer's Market last Saturday. There was a huge assortment of beautiful Heirloom tomatoes available in every color and shape imaginable (for a tomato). I also found a wonderful little bag of 'haricot vert' (skinny, little French green beans) that immediately called out to me ...'Bean Bundles'! Haricot verts are more tender with a more complex flavor than regular green beans.

With that inspiration, I came home and picked both red and yellow Heirloom tomatoes from my greenhouse. The week old bread that was destined for croutons conveniently became the bread for my salad instead.... and it became Panzanella time in my kitchen! The Bean Bundles are an adorable addition as a vegetable accompaniment and edible garnish.

Heirloom Tomato Panzanella with Bean Bundle
Heirloom Tomato Panzanella with 
       Bean Bundles    Yield: 6 servings
Salad;
6 large, fresh, ripe Heirloom Tomatoes;
     diced into 1/2" pieces 
1/2 large, sweet or red onion, thinly sliced
1/4 cup thinly sliced fresh basil leaves*
4 Tbsp. balsamic vinegar
1/2 cup extra virgin olive oil
1 tsp. freshly ground black pepper
1 tsp. sea salt
1 tsp. granulated sugar
6 cups day old, dense, crusty bread;
     cut into 1" cubes 

In a large bowl, whisk together balsamic vinegar, olive oil, pepper, salt and sugar. Add diced tomatoes, onion and basil; toss gently to combine. Set aside to allow the flavors to marry for about 10 minutes.
Add bread; toss well to coat. If the bread seems dry, sprinkle with a tablespoon or two of tomato water. Salad will hold for several hours at room temperature before serving. 
*Chef's Tip: to slice basil; stack the leaves and roll up like a cigar. Hold tightly and slice very thin into a 'chiffonade'.

Bean Bundles;
36 haricot vert or thin green beans; if too thick, cut in half lengthwise
6 strips of carrot or green onion tops for ties 

To prepare the ties; use a vegetable peeler and peel long strips of carrot OR use the tops of green onions. Place in a shallow container and pour boiling water over them to soften; drain and rinse under cold water. Cut into narrow strips. Tie groups of 6 beans into bundles, cutting off the ends of the ties.
Place a vegetable steamer over boiling water. Gently place the bundles in the steamer basket and steam for 8 minutes. Serve as a vegetable accompaniment. 

Till next week ... Bon Appétit!


Photos by Sally Rae 

Friday, August 14, 2015

Barding and Larding ...plus Tying a Roast

To 'Bard' and 'Lard' are culinary techniques; the purpose of either method is to introduce fat to meat, poultry or game.

#1 Bard and start with a slip knot
'Barding' is the culinary technique of wrapping meat, poultry or game in thin slices of fat, bacon or salt pork before cooking. The main purpose of barding is to maintain moisture of the meat. It also helps keep it from overcooking and adds flavor.

'Larding' is the culinary technique of adding thin strips of salt pork or fat into meat with a special larding needle. It is a classical technique that dates back to when meat was much leaner and dryer than today. It is essentially a way of creating artificial marbling. Modern meat has much more marbling so this technique is not used much anymore. That said, larding can be useful for preparing lean game meat such as venison, that might otherwise dry out when roasted. The main purpose of larding is to enhance the moisture of the meat and add flavor. 
#2 Continue to loop and keep tension

I am sure many of you have wrapped a lean chicken breast or pork tenderloin in bacon not knowing that you were 'barding' the meat! The 'Bacon Wrapped Pork Tenderloin' in the photos is from 'For the Love of Food' page 217. This idea sprung from my original favorite that used a boneless, skinless, turkey breast; seasoned, wrapped in bacon and tied with butchers twine to even out the shape and hold the bacon in place. The turkey breast was then cooked on a rotisserie spit in a barbecue with a hickory smoke pouch. This combination of techniques turned what could be an unappetizing, dry, piece of meat; into a tender, juicy and flavorful delight!

Learning to tie a roast can be a challenge at first. I would suggest using a rolled up hand towel instead of raw meat to practice. There are two main reasons why you would tie a piece of meat. The first is if you have an uneven piece of meat and you want to even out the shape so it will cook more evenly. The second is if you have a rolled and stuffed piece of meat or you have used the barding technique. Tying a roast will help the roast cook evenly and carve nicely.  

#3 Ready to Roast
Now back to that pork tenderloin... after barding, the meat is tied using a long piece of butchers twine rather than a bunch of short pieces. Tie a slip knot, leaving a short end of string to tie off later (photo #1). Then place the loop around one end of the roast and tighten just enough to hold, but not cut into the meat. (It may help to use toothpicks to hold the bacon in place while you work on your tying skills.) Keep tension on the string but don't pull too hard. Continue to loop and move the string along the roast to the other end (photo #2). Flip the roast over and thread the long end of the string under the loops along the length of the underside of the roast. Flip the roast over again and adjust the tension. Bring the long string around the end of the roast and tie to the short end of string that was left on the first slip knot. Cut off the excess string (photo #3). 

At this point, I tightly wrap the tenderloin in plastic wrap and refrigerate for at least 4 hours. This allows some of the bacon cure and flavor to penetrate the roast. This is why the cooked tenderloin still looks pink. Always use a meat thermometer for the true internal temperature of cooked meats and poultry. Remove from the oven and tent the meat with foil and allow to rest for 10-20 minutes before carving. This rest time allows the juices to re-distribute back into the meat for a tender, juicy result. Carefully cut the butchers twine with kitchen shears and remove all strings before carving
Bacon Wrapped Pork Tenderloin with Maple Mustard
Till next week ... Bon Appétit!

Photos by Sally Rae

Friday, August 7, 2015

Mid Summer's Harvest and Recipe

It's hard to believe we are already into August! Although with the heat, mulching and amount of time spent hand watering, it already feels like summer has been a long haul. The cooler evening temperatures and light rain this week is a welcome change!
Beyond all that, it certainly has been an interesting year so far with my experimental container garden. I am already making notes and lists of what works and which vegetables are just not worth the time, space and water! Here is my latest short list of the good, the bad and the ugly...
Corentine Pickling Cucumber

The Corentine Pickling Cucumbers from William Dam have been beyond delightful! Yields are high, fruits crisp and uniform in size with small spines. I have already fermented 6 quarts of Garlic Dill Pickles with the 'Perfect Pickler'....although a few jars were topped up with cauliflower or daikon radish slices. Next year I will start more of these, my new favorite for pickles and salads!
Burgundy, Yellow and Green Bush Beans

I grew my usual three colors of bush beans; Royal Burgundy, Rocdor Yellow and Delinel Green from William Dam. Planted them heavily in three long, narrow planters (that fit over a 2x6" railing like a saddle), but left them on the ground, partially shaded beside the greenhouse. I did not hold much hope because of how shallow the soil was in the center of the planter. To my surprise, these have been one of the most worthwhile vegetables, especially the Rocdor and Delinel. Producing about 1lb. 6oz. of tender, straight beans per picking. More than we could eat for a meal, so I have enjoyed a few good feeds of my favorite bean salad.
Sunshine and Small Sugar Winter Squash

I have been spoiled with incredible winter squash harvests the past few years. Sunshine from William Dam, is a winter squash I cannot imagine living without. I just took the last one from my storage room from the 2014 harvest. Worried it would not be edible, it had a small mold spot starting at the blossom end. The monster sized squash was delicious roasted and I even had enough to experiment with 'dehydrated squash strips' for doggie snacks!

Winter squash with pruned foliage
Sad to say, one of my most disappointing trials has been the winter squash. I had hoped they would trail up the stairs which they did at first. However, with pollination problems and the dropping fruit I mentioned last week, I have already pruned the plants back. Again, I was too ambitious with 2 plants per pot, and with the weather, even though I fertilized heavily, the squash are very small and yielded only one per plant. This week I pruned off all excess foliage leaving just the fruit attached and a few feet of vine beyond.
Ripe Desert King Figs

I have heard comments that it is a strange year for figs. Mine ripened about 3 weeks early and needed lots of water to the surrounding roots, not just at the trunk of the tree. I discovered this after finding dry, unripe figs falling to the ground. Deep watering a larger area surrounding the trunk did the trick. As mentioned, they ripened early; delicious, delicate and dripping with honey (notice in the photo). Unfortunately wasps and ants caused a lot of damage which I have not usually found to be a problem in the past. So I would agree, a strange fig year with an early, lower yield due to the drought and pests. 
The recipe below uses fresh, ripe figs and I must indulge at least once through fig season!

PROSCIUTTO ROASTED FIGS   Yield: 12 figs 
This is an all time favorite recipe of mine... from 'For the Love of Food'!

12 fresh figs
Prosciutto Roasted Desert King Figs
1/4 lb. Gorgonzola cheese
1 Tbsp. Cognac
1 tsp. cracked black pepper
12 thin slices prosciutto
1/3 cup honey
Fresh ground black pepper

Preheat oven to 400F. Cut into the figs half way, creating a 'pocket', being careful not to go all the way through. In a small bowl combine Gorgonzola, cognac and pepper. Mix together using a fork until well blended.  Stuff the figs with cheese mixture. Wrap prosciutto evenly around each fig to enclose it. If necessary, secure with a toothpick. Stand figs on a parchment lined bake sheet. Bake until prosciutto melts slightly and forms a skin around the figs, 12-15 minutes. Transfer to a serving platter. Drizzle with honey and season with fresh ground black pepper. Serve warm or at room temperature. 

Till next week ... Bon Appétit!


Photos by Sally Rae