Tuesday, December 25, 2018

Happy Holidays!

Billie and Portia 2018
Winter storm season is upon us. For the past few weeks, Denman and the surrounding Islands have been hit by a series of nasty storms. Thankfully so far, we have escaped damage to our property, that's not the case for many others. We have relied on the generator and wood stove as the storms pummeled the Island taking out power lines, blocking roads with huge trees and debris and flooding low lying areas. Check out my Featured Post, 'When Good Food Goes Bad' in the right hand column for tips during power failures.
 
Thank you for spending time with me here every month. I enjoy sharing my food and gardening knowledge, my new Paleo journey ... and experiments! Your feedback, questions and comments are very much appreciated. 

Thank you for your kind words and support through this challenging year. I'm looking forward to ... and wish for all ... a Happy, Healthy 2019!


Till next year ... Bon Appétit!


Photo by Sally Rae

Saturday, November 3, 2018

Turn Vegetables Into Noodles!

My new toy!
The popularity of recipes using spiralized vegetables is on the rise. Spiralizers, whether hand turned or electric, produce the likes of zoodles from zucchini and swoodles from sweet potatoes to name a few! Grocery stores, and even Costco are selling vegetables in noodle and ribbon forms... low carb, gluten free, Whole30 and Paleo diet compliant... a fun and healthy option.
Simple to assemble with few parts

I have been following a fairly strict Paleo diet since completing a month of Whole30 in May 2018. I was beginning to get bored with the meals until I found a few tools to help make cooking and eating a bit more fun. For almost a year, I had been searching for an electric spiralizer... my strict requirements include; compact, easy to use, easy to clean, minimal storage space. Most of the electric versions I found didn't tick the boxes until someone turned me onto the 'Gourmia Curly Q Electric Spiralizer'... Thank You DC!!

Compact for storage

This little gem compacts neatly for storage and requires only a 10-1/2" height clearance. The bowl is easily used for storage if you want to prepare the vegetables earlier in the day and store your vegetable 'pasta' covered, in the fridge until meal time. There are three cone blades; ribbon, fettuccine and spaghetti. 

Zoodles and conical ends that remain
The vegetables must be trimmed to fit in the chute. 
Very skinny vegetables, like carrots will not work well, as there is a small, center core of waste from the blades. Also a cone shaped piece remains after spiralizing. I just set them aside and chop these ends for another use. I have been obsessed with Asian inspired flavor profiles lately. This is my new favorite zoodle salad recipe...

THAI 'ZOODLE' SALAD         Yield: 6 servings
This flavorful, crunchy salad is night shade free and is also Whole30 and Paleo compliant. 

4 medium zucchini, spaghetti spiralized
1 medium carrot, coarsely grated 
½ English cucumber, sliced into 2" long, thin strips 
4 green onions, sliced on the diagonal 
½ cup of fresh cilantro 
¼ cup activated, toasted almonds, roughly chopped 
kosher salt 

Thai Dressing
1/8 tsp. wasabi powder 
2 cloves garlic, finely minced 
2 Tbsp. fresh ginger, peeled and finely minced or grated 
¼ cup green onion, thinly sliced 
2 Tbsp. rice vinegar 
2 Tbsp. coconut aminos 
2 Tbsp. almond butter 
1 Tbsp. sesame oil 
1/3 cup coconut milk

Instructions
1. Run the zucchini through a spiralizer spaghetti blade, then break the zoodles into 8" length pieces. Place it in a bowl.
2. Add the grated carrot, sliced cucumber and green onions. Set aside while you make the Thai Dressing.
3. For the dressing; combine the wasabi powder, garlic cloves, ginger, green onions, vinegar, coconut aminos, almond butter, sesame oil and coconut milk in the jar of a blender. Blend on high until you have a smooth dressing.
4. Toss the zoodles with just enough of the dressing to get it well dressed
, season to taste.
5. Add the fresh cilantro and gently toss, garnish with chopped almonds. Serve immediately. 

~~~~~~~~~~~~~~~~~~~~~~~~~~~~~~~~~~~~~~~~~~~~~~~~~~~~~~~~~~~~~~~~~~~~~~

This summer I tried a new zucchini seed in my garden from William Dam, called 'Cassia Organic'. It is a true Italian Romanesco summer squash. I will definitely grow this variety again next year. High yielding and cool tolerant, a nutty flavor, firm flesh and makes sturdy zoodles. I had several comments from friends that my Cassia Zoodles, after a gentle stir fry in coconut oil, then a quick steaming were very close to the texture of 'real' pasta! If you don't garden or just want to try them out first, Jeremy and Kerri of Rhubarb Ranch had the Romanesco summer squash at the Saturday Market ... watch for them next summer!
Gently saute in a bit of clarified butter or coconut oil
Until next time ... Bon Appétit!


Photos by Sally Rae
Recipe by Sally Rae

Saturday, October 13, 2018

Time to Plant Garlic

Choose large, blemish free and disease free cloves
For those who grow winter vegetables, it's time to plant garlic for next years crop. If you have never tried growing your own garlic, it is easy to grow with a few guidelines. 

Garlic is not suited for growing in containers, it is better in the ground or raised beds. Any time this month is good but definitely have it in the ground before the end of October. I used to plant later in the year but an October planting gives the root system more time to develop, therefore larger bulbs at harvest. Once warm weather appears in May, the plants are stimulated to form bulbs regardless of how much root system they have at the time.
February ~ pull mulch back a bit

To prepare the garlic for planting; separate the cloves but don't skin them. Use large, blemish free and disease free cloves. Dig over the soil well, add compost and rake the bed to level. Be sure not to compact the soil by stepping on it. Set each clove, pointed end up about 4-6 inches apart with the tip of the clove 1-2 inches deep. Plant deeper if frost or rain may expose the cloves and plant shallower if planting into heavier soil or mulching heavily.

April 2016 garlic crop
After planting, mulch the beds with a 3-6 inch layer of straw or dry leaves. This protects the soil from erosion and protects the cloves from being heaved up by frost. If you see tips of green shoots poking up in December or January, don't worry, garlic shoots are very hardy and will be fine. 

July 2015 Harvest
Once the sun is on the garden, (in my garden usually by late February), pull the straw mulch away from the emerging sprouts. Do not totally remove the mulch as the weather is still unpredictable. Fertilize the spring growth, water as needed and keep weeded. 

When the flowers develop at the top of the stalk, cut them to keep energy in the bulb. These are called garlic scapes and are delicious to use in stir fries, pickled or in my incredible 'Garlic Scape Pesto'. 


A whole new meaning to the term 'one clove of garlic'!
On a final note... 'White Rot' is a fairly common disease that causes black spots and decay on the bulbs. It is easily spread in infected soil and water ... and is very persistent in the soil. The best way to avoid it is not to leave decaying alliums in the ground and by using a strict 4-year rotation in your garden. 

I grow two varieties of garlic but hands down, these huge garlic cloves are my favorite! Each garlic bulb has only 2-4 huge cloves! Unfortunately I don't remember where I originally acquired the seed and don't know the name ... and no, it is not elephant garlic!! Each clove is equivalent to 3-4 'normal' garlic cloves but is slightly more mild in flavor than the other variety I grow. 

Until next time, enjoy your garden clean up jobs in the coming week of sunshine, and ... Bon Appétit!


Photos by Sally Rae 

Thursday, October 4, 2018

Marvelous Melon Experiment

I know for a fact ... juicy, sweet, melons can be grown on Denman Island because I buy them at our Denman Saturday Farmer's Market!
I had access to a second portable greenhouse this summer and decided to try my hand at growing several varieties of melon in containers. Through research on the topic of container planting for melons, this is possible with one plant per (at least) 5 gallon pot. I started the seeds a bit late, but still got a few melons to fully ripen on the vine. To judge ripeness; watermelons are ripe when the tendril nearest the fruit is dry. Ripe cantaloupe will easily detach from the vine with light finger pressure. This is why most grocery store melon is lacking in flavor... when commercially grown they are picked, shipped and sold before ripening. The problem being, melons do not ripen off the vine

Cream of Saskatchewan Watermelon
 'Cream of Saskatchewan' Watermelon from Seed Savers Exchange ... was "brought to Saskatchewan by Russian immigrants and does well in cool northern climates. Fruits are round, up to 10" in diameter and 4-10 pounds. A rare treat with sweet, white flesh, exceptional flavor. Pale green skin with dark stripes. Very thin rind, must be handled with care - strictly garden to table."

This melon is indeed delicate and its pale flesh is unusual to the eye. It was crisp and extremely juicy with a very thin rind. The flavor was mild and not as sweet as I had hoped. I feel this delicate melon required more sunshine and heat than my north facing property could provide.

Seascape Strawberries and 
 Cream of Saskatchewan Watermelon
As usual, the Seascape Strawberries did not disappoint! These huge, juicy, sweet berries produced a larger June crop than usual. The second crop is always very impressive with even larger fruit. Finally at this years Denman Island Blackberry Faire, my fresh strawberry entry won first prize in the Berry Category of the produce judging. Although shortly after that the rains came and the rodents took advantage of my sparse garden visits. The plants are loaded with large green berries that will not ripen unless we get some sunny, dry days soon. My last big harvest in this photo was September 11th, 2018. 

Earlichamp Cantaloupe
'Earlichamp' Melon is from West Coast Seeds, "a cantaloupe with slight sutures and heavy netting. The fruit is large and heavy. The bright orange flesh is cool and sweet."
These melons were impressive to watch grow. The tiny pollinated fruits seemed to explode in size every day! I knew they were ripe and days away from picking when I opened the greenhouse and the sweet aroma of ripe melon filled the air ... simply intoxicating! 
Earlichamp Cantaloupe
When ripe the large, heavy fruits easily released from the vine. Again, I expected more sweetness from this melon. This may sound odd, but their aroma was sweeter than their taste. 

It was an interesting experiment and next year I may try them again but in the garden with black plastic mulch to increase the soil temperature and possibly a poly tunnel to increase the air temperature. I hope the garden will get more sunshine hours than the new location of the greenhouses this year. Melon plants need 8-10 weeks of good, hot growing weather from the middle of June to the end of August. So if you are planning to give them a try in your 2019 garden or greenhouse; mark your calendar, order your seeds early and start them indoors or in a greenhouse in the third week of April. Transplant at the end of May or early June when the seedlings are 5-6 weeks old. Remember, melons do not ripen off the vine, so plan to leave them intact even into September.
After growing up in Alberta, this was a rewarding growing experience and I'm planning more marvelous melon experiments for 2019!

Until next time... Happy Thanksgiving and Bon Appétit

Photos by Sally Rae  

Sunday, September 16, 2018

How to Activate Nuts... and Why!

If you notice a heavy feeling in your gut after eating regular commercial nuts, you are experiencing indigestion from the enzyme inhibitors and phytic acid that naturally occur in them. Soaking nuts and seeds 'activates' them and neutralizes the anti-nutrients in these plant foods.
Activated walnuts, macadamia nuts and pecans
Nuts and seeds contain 'phytic acid' also known as phytates which binds to minerals in the digestive tract, making them unavailable. Sprouting removes phytic acid which is found in most nuts, seeds, grains and legumes

Sprouting is the basis of all plant life, concentrating nutrients and unlocking the germ of the seed to reveal its inner life. Soaking and dehydrating nuts and seeds at low temperatures provides superior nutrition and digestibility. When substituting nut and seed flour in grain-free diets it is crucially important to prepare the nut and seed flours properly to avoid mineral deficiencies.

Nuts and seeds also contain enzyme inhibitors which prevents the seed from sprouting prematurely. This also forces the human digestive system to work overtime to break down this food. The perfect conditions to germinate include warmth and moisture. The way to reduce phytic acid and enzyme inhibitors is to soak, sprout and/or ferment the nut or seed. This also applies to grains and legumes.

May traditional cultures used salty sea water to soak nuts then dry them in the sun. At home, use a good quality sea salt and water to soak the nuts and a dehydrator at 135F or the oven between 135⁰F and 150F can be used to dry them.

HOW TO ACTIVATE NUTS AND SEEDS
Clearly most commercial nuts are not properly prepared, although 'sprouted' raw nuts can be found in health food stores. At home, you can do a lot of nuts at a time and freeze them, that's what I do!

Ingredients:
A variety of raw nuts; pecans, walnuts, hazelnuts, almonds, macadamia nuts
Good quality sea salt

Place each variety of nuts in a separate large bowl with 2-3 Tbsp, of sea salt that is dissolved in water.
Soak for 10-12 hours or overnight *NOTE: if using cashews soak between 3-6 hours or they will become slimy. After soaking whole almonds, remove the skins before dehydrating. Pinch them between your thumb and first finger and the skin will pop off.
Drain nuts through a sieve, rinse thoroughly under running water and shake out excess water.
Place each variety of nuts on separate dehydrator trays
Dry at 135⁰F for 12-14 hours or until they are crispy and dry.
 
I have never liked the slight bitterness of walnuts... once activated they have become my second favorite nut, next to pecans!
Until next time... Bon Appétit!


Photo by Sally Rae

Sunday, April 29, 2018

Whole30 ~ For The Health Of It

I recently had a consultation with a Functional Medicine Practitioner. My personalized prescription started with a Paleo style, whole organic foods, AIP (Autoimmune Protocol) diet. For 30 days, the guidelines followed are easily found through "Whole30". I learned how some of my favorite foods are having a negative impact; creating chronic inflammation, low energy levels, digestive issues and chronic pain without even realizing it.
 
This protocol does require effort; grocery shopping, meal planning, dining out, discipline ... it comes down to taking responsibility for your plan and learning to say 'No, thank you'. YOU make the choice to eat something healthy, to commit 100% for the full 30 days. *"The plan eliminates the most common craving-inducing, inflammatory, blood-sugar disrupting, gut damaging food groups for a full month. The 30 days are required to break bad habits and stop unhealthy cravings ... to let your body heal and recover from whatever effects those foods may be causing ... and push the reset button with your health, habits and relationship with food."

Whole30 compliant
Read Labels!! 
I was shocked to find hidden sugar, sulphites and grains in many of my favorite condiments. My pantry is now re-stocked and Whole30 compliant with ... Spectrum Organic Balsamic Vinegar of Modena (natural occurring sulphites is Whole30 compliant), Red Boat Fish Sauce (no sugar, just anchovies and salt), Coconut Aminos to replace soy sauce, Maison Orphée Organic Raw Dijon Mustard, Primal Kitchen Real Mayonnaise with avocado oil, organic coconut milk and cream and Chosen Foods cold pressed naturally refined Avocado Oil for all cooking and high heat applications. Avocado oil has health benefits similar to olive oil, and a high smoke point (260̊ C or 500̊ F). At its smoke point, an oil begins to break down producing toxins and trans fats that can have a foul odor and taste and are toxic to our body.

For years I have not eaten nightshades; potatoes, tomatoes, eggplant and peppers, they trigger my arthritis. With recent health concerns, I have been eating a totally grain free diet since May 2017, no grain of any kind including all rice and corn. The Whole30 plan has also eliminated all dairy, sugar (including stevia, a bit shocking but I now understand WHY), legumes, alcohol, carrageenan, MSG, sulphites, baking, junk food and treats. There are a few exceptions to the rule, so it's best to check out the Whole30 site. I found their 'tough love' section very helpful. *"It's not hard" ... *"It's only 30 days and it's for the most important health cause on earth--the only physical body you will ever have in this lifetime."

The recipe below started out with a need for something I could have on hand for any meal of the day and take on the ferry for a quick, healthy snack or lunch. It has morphed into one of my favorite foods; crunchy yet creamy, filling and healthy, with options to make it into a complete meal by adding olives, avocado slices or hard boiled eggs. 
I hope you enjoy it as much as I do!

Kale Salad with Avocado/Lemon Dressing   Yield: 4-6 servings 
Crunchy yet creamy, even on the third day in the fridge! Turn this salad into a more complete meal by adding olives, avocado slices and/or sliced hard boiled egg.

1/2 bunch organic kale; washed, dried, stems removed and thinly julienne sliced 
1 Tbsp. fresh squeezed organic lemon juice 
Mise en place
1 Tbsp. organic extra virgin olive oil 
6 small leaves Chinese cabbage, thinly sliced 
3 large organic mushrooms, halved and sliced 
1/2 small organic zucchini, halved lengthwise and sliced 
2 stalks organic celery, sliced on the bias (diagonal cut) 
3 organic green onions, sliced on the bias (diagonal cut) 
~Serve with olives, sliced avocado and/or sliced hardboiled egg, optional  

Wash and dry the kale, remove and compost heavy stems, julienne slice leaves thinly. Place in a large bowl with 1 Tbsp. each lemon juice and olive oil. Massage the kale until softened. Set aside and make the dressing.

Avocado/Lemon Dressing
 
Avocado/Lemon Dressing
3 Tbsp. fresh squeezed organic lemon juice
1/3 cup organic extra virgin olive oil  
1 large or 1-1/2 small, ripe avocados  
1 tsp. organic Dijon mustard  
4 cloves organic garlic, minced  
1/2 tsp. sea salt  
1/4 tsp. freshly ground pepper 

To make the dressing; in a small food processor, combine all dressing ingredients until smooth, set aside. 

For the salad; wash, trim and cut all remaining vegetables, add to softened kale and toss to combine. The dressing will be thick, spoon over salad and 'rub' into ingredients with a silicone spatula or the back of a spoon. Continue to rub and fold the dressing into the salad until combined. 
For a more complete meal, serve with olives, sliced avocados and/or hardboiled eggs.
Healthy, delicious and Whole30 compliant!
Till next time ... in good health and Bon Appétit!


Recipe by Sally Rae
Photos by Sally Rae
*Some Information above has been gathered through Whole30

Wednesday, April 11, 2018

The Dirty Dozen and Clean 15

I was surprised how many people have never heard of the 'Dirty Dozen' and the 'Clean 15'. If your brow is furrowed with confusion right now... my case in point!! 

Each year, the Environmental Working Group (EWG) releases the "Dirty Dozen", a list of the most pesticide-laden produce. EWG bases the list on tests done by the U.S. Department of Agriculture (USDA). The 2017 annual report found a single strawberry sample with 20 different pesticide residues. Researchers also found DDT, a neurotoxic insecticide banned in the USA, in an alarming amount of spinach samples.

A "Clean 15" list is also included in the report, identifying the non-organic produce least likely to be contaminated with pesticide residues. I advise to choose and grow organic as often as possible. Washing may remove some of the residue but systemic pesticides are inside the produce and can still carry pesticide residue even after being washed and peeled. A good rule of thumb is to always eat lots of vegetables but choose organic when possible. Especially when it comes to Dirty Dozen items.
Local, Organic ~ From the Denman Saturday Market
This list should in no way deter you from eating fruits and vegetables, but it should make you aware and cautious of modern chemical farming practices. Using chemicals to kill weeds, microbes and bugs has numerous unwanted side effects including killing soil health and beneficial microbes. Pesticides are linked to dozens of health problems and other issues. Also, even low levels of pesticide exposure can be harmful to infants and young children. When possible, parents should take steps to lower children's exposure to pesticides while still feeding a diet rich in fruits and vegetables.

The EWG’s 2017 Dirty Dozen List

Strawberries
Spinach
Nectarines
Apples
Peaches
Pears
Cherries
Grapes
Celery
Tomatoes
Sweet Bell Peppers
Potatoes

The EWG’s 2017 Clean 15 List

Sweet corn*
Avocados
Pineapples
Cabbage
Onions
Frozen Sweet Peas
Papayas*
Asparagus
Mangoes
Eggplant
Honeydew
Kiwi
Cantaloupe
Cauliflower
Grapefruit

       *Buy organic to avoid GMO Papayas and Sweet Corn

Till next time ... Bon Appétit!

Photo by Sally Rae

Sunday, March 11, 2018

Parmesan Crisps

Parmesan Crisps
It is 'Spring Ahead' day today... Daylight Saving Time. I'm not a fan of the practice and would be very happy if B.C. would abolish it, and soon. I miss that hour and feel tired for months without it. I've been told "it's all in my head" but no, it's all about my body clock and I'm not an early bird!! 
Before I get into a big rant, best change the subject to food!! How do you feel about Daylight Saving Time?
       ~~~~~~~~~~~~~~~~~~~~~~  

Ah, the Parmesan Crisp ... ridiculously fast and easy to make. These lace looking crisps are low carb, gluten free and satisfy the need for a crunchy snack. You can bake up a batch of these in less than ten minutes. Just be sure to keep grated Parmesan cheese on hand!
Line a bakesheet with parchment or a silicone sheet

Easy Parmesan Crisps       Yield: 12 crisps
These easy, low carb snacks are ready in less than ten minutes!

12 Tbsp. shredded Parmesan cheese,
     (a generous 1/2 cup)

Preheat oven to 400F. Place a tablespoon of cheese for each crisp onto a bakesheet lined with parchment paper or a silicone sheet. Lightly pat down and space about one inch apart. Repeat with remaining cheese.
Bake in preheated oven for 3-5 minutes, until golden and crisp but not burned around the edges. Remove from the oven and allow to cool. Store in an airtight container.
Parmesan Crisps; serve with soup, salad or as a snack

Delicious served with salad, float on top of soup or on its own as a crispy snack! 

Till next time ... Bon Appétit!


Photos by Sally Rae

Tuesday, January 30, 2018

Macaron vs Macaroon

Perfect French Macarons ... just out of the oven
So what's the difference? 
The French Macaron (mack-a-ROHN) is one of the most delicate petits fours both to make and eat. They are characterized by a shiny and smooth top, a ruffled circumference (referred to as a 'foot') and a flat base. Once baked and cooled they are 'filled' with ganache, buttercream, jam or curd for an endless array of flavor combinations. Above all a French Macaron is very moist in the center and easily melts in your mouth. Don't be daunted by the list of steps. Although they can be finicky and delicate to prepare they can be made at home. 
The related Macaroon (mack-a-ROON) is often confused with the Macaron. The Coconut Macaroon is a mounded cookie made of shredded coconut and condensed milk and is often dipped in chocolate.


FRENCH MACARONS                   Yield: about 45 cookies
French Macarons are a light, airy, meringue based sandwich cookie that is gluten free, elegant and delicious. When packed in an airtight container, they freeze very well.

'AmeriColor' -soft gel paste food color

Ingredients:
1 3/4 cups confectioners' (icing) sugar
1 cup almond flour
3 large egg whites, at room temperature
Pinch of cream of tartar
1/4 cup berry sugar (superfine)
2-3 drops soft gel paste food coloring ~ see below
1/2 tsp. pure vanilla, almond or mint extract ~ see below
*Assorted Fillings ~ see below
**for Chocolate Macarons ~ see the special note below


Assorted Fillings:
Three flavors of delicate, elegant French Macarons
   *Raspberry ~Tint the batter with 2 drops neon pink gel food coloring, flavor with almond or pure vanilla extract. Fill with seedless raspberry jam (you'll need about 3/4 cup)
   *Chocolate Mint ~Tint the batter with 2 drops mint green gel food coloring, flavor with mint extract. For the dark chocolate mint ganache filling; in a bowl set over warm water; melt 4 oz. finely chopped high quality dark chocolate, stir in 2 tablespoons whipping cream and 1 tablespoon butter, stir until smooth. Stir in 1/4 tsp mint extract. Cool slightly, until it is thick but not hard, before filling.
   *Lemon ~Tint the batter with 2 drops lemon yellow gel food coloring, flavor with lemon extract. Fill with lemon curd (you'll need about 3/4 cup), you can add 1 drop of lemon yellow gel food coloring to the curd if you wish.
   *Blackberry Cheesecake ~Tint the batter with 2 drops royal blue plus 2 drops violet gel food coloring, flavor with pure vanilla extract. For the filling; mix 3/4 cup Mascarpone cheese with 3 tablespoons seedless blackberry jam.
   *Coconut ~Do not tint the batter, flavor with pure vanilla extract. For the white chocolate/coconut ganache filling; in a bowl set over warm water; melt 4 oz. finely chopped high quality white chocolate, stir in 2 tablespoons whipping cream, 1 tablespoon coconut powder and 1 tablespoon butter, stir until smooth. Stir in 2-3 teaspoons of medium shredded coconut. Cool slightly, until it is thick but not hard, before filling. 
  **Chocolate Macarons ~Add 3 tablespoons of sifted cocoa powder to the icing sugar and almond flour mixture, proceed with the recipe. Fill with dark chocolate ganache; in a bowl set over warm water; melt 4 oz. finely chopped high quality dark chocolate, stir in 2 tablespoons whipping cream and 1 tablespoon butter, stir until smooth. Cool slightly, until it is thick but not hard, before filling.  

Directions:
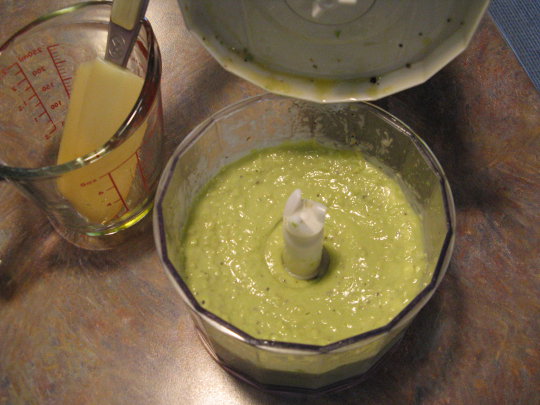
Preheat oven to 300°F using the convection setting. Line 3 bake sheets with parchment paper. In the bowl of a food processor fitted with a metal blade, add almond flour and confectioners' sugar (add cocoa if using). Run until you have a fine powder. Sift this mixture at least two times. The more you sift, the smoother the tops. Press through with a rubber spatula to pass through as much as possible. Discard any lumps between sifting then set sifted mixture aside.

Using a stand mixer with a whisk attachment, whip the egg whites and cream of tartar on medium speed until frothy. With the machine running, add the berry sugar one tablespoon at a time. Turn off and scrape the sides. Increase speed to high, beat until stiff and shiny, about 1-2 more minutes. To test the mixture; turn off the mixer and lift the whisk attachment. The mixture should hold its form at the tip of the whisk and not drip.

Remove bowl from mixer and set on the counter. Add 1/3 of the sifted almond flour mixture. Draw a rubber spatula halfway through the mixture and fold gently to combine, giving the bowl a quarter turn with each fold. Add another third of the almond flour mixture, fold again. Add the final third and fold until incorporated. The batter should now be firm with a glossy shine. Add the desired food coloring and extract. Continue folding and turning, scraping down the bowl until the batter is smooth and falls off the spatula in a thin, flat ribbon, 2 to 3 minutes. 

Hold the piping bag vertically and close to the bakesheet
Piping the macarons ~ Place a pastry bag fitted with a #12 (1/4") plain round tip in a tall water glass, fill the bag 3/4 with batter. Holding the bag vertically and close to the bake sheet, pipe into small, even rounds about 3/4 to 1-inch in diameter. Pipe in staggered rows about one inch apart. After piping the circle of batter, quickly flick your wrist to the side so a point doesn't form. If a point forms, just smooth it with a small spatula later. Firmly tap the baking sheet twice against the counter to release any air bubbles.
Allow cookies to 'dry' before baking

Let the cookies sit at room temperature until a dry shell forms on the tops. Touch the batter with your fingertip. When they are no longer sticky to the touch they are ready for the oven. The resting time can take 15 minutes to an hour depending on the humidity. It's important that the tops dry out, otherwise they will crack while baking.

When  the tops are dry, slip another baking sheet under the first batch, a double baking sheet protects the cookies from the heat. Bake one sheet at a time in the lower third of the oven. If you don't have a convection setting, rotate the bake sheet half way through baking. Bake until the cookies are shiny and rise 1/8 inch to form a 'foot', 15-20 minutes. When done, the tops will be firm to the touch and the center won't 'jiggle'. Remove from the oven and let cool at least 10 minutes. If the macarons are too hot, they will come apart. Gently peel cookies off the parchment paper and transfer to a cooling rack.

Pipe filling and gently press sandwich together

When all are baked and completely cooled; arrange the cookies by twos top side down, matching sizes. Pipe a dime to a nickel size of filling onto the bottom cookie. Alternately, you can use a palette knife to smear on the filling before sticking them together. Lay the second macaron on top. Gently press together so the filling expands but does not come out of the sides. Repeat for all remaining macarons. 

Store in an airtight container in the fridge. When packed in an airtight container, they also freeze very well.

These delightful, elegant, gluten free confections make a wonderful gift for Valentine's Day, Easter, Birthdays or any special occasion!

The perfect gift ... handmade with Love!

Till next time ... Bon Appétit!

Photos by Sally Rae
Recipe adapted by Sally Rae