Wednesday, October 28, 2015

Pumpkin Pecan Loaf

With Halloween just around the corner, here's an idea... recycle your jack-o-lanterns into pumpkin purée for my favorite 'Pumpkin Pecan Loaf' recipe. Only use your jack-o-lantern for purée if it was freshly carved the day prior, and outside only a few hours for Halloween night. Be sure to clean the inside of the pumpkin for any charred flesh or bugs before roasting! 

To make fresh pumpkin (or winter squash) purée; 
Preheat oven to 400F and brush a bake sheet lightly with oil. Cut pumpkin in half and scoop out the seeds and strings. Place pumpkin, cut sides down on the prepared bake sheet. Bake until the flesh is soft when pierced with a fork, about 45 minutes to an hour. Remove from the oven and let cool.
Scoop out the flesh into a food processor, purée until smooth, then transfer to a cheesecloth lined sieve placed over a large bowl. Allow to drain for 30 minutes before using. Cover and refrigerate for up to 5 days or freeze in airtight containers for up to one year.
*Chef's Tip: If you are making soup, use the drained pumpkin juice for all or part of the liquid called for in the recipe.

I used kabocha squash purée for my Pecan Loaves this time. The squash flesh was dense, sweet and smooth but the loaves took an extra 15 minutes to bake through. It is important to remember in baking that timing is affected by many different factors. The accurate 'test of doneness' is done with a toothpick or cake tester, inserted into the center of a loaf or cake. When it comes out clean, the cake is done. 

*More Substitutes: I have used organic spelt flour instead of unbleached flour and organic palm sugar in place of granulated sugar in this recipe with success.

*Chef's Tip: In commercial bakeries, batters are made in very large batches. To portion batter, a weigh scale is used for each cake. The pan and batter are weighed together, this produces each loaf or cake the same size and therefore they bake in the same timing. If you have a scale and 2 identical loaf pans this is an easy task and results in equal baking time and equal size of the loaves.

PUMPKIN PECAN LOAF      Yield: 2 loaf cakes 
Pumpkin gives a rich color, distinctive flavor and delicious moisture to this easy quick bread. This is a great recipe to use up some of that pumpkin purée you froze last fall!

Cool for 10 minutes in the pans
3 cups unbleached all-purpose flour 
2 tsp. baking soda 
1½ tsp. salt 
1 tsp. ground cinnamon 
½ tsp. ground nutmeg 
½ tsp. ground ginger 
¼ tsp. allspice 
2 cups granulated sugar 
1¼ cups pumpkin purée (canned or cooked) 
1 cup vegetable oil 
2/3 cup water 
2 eggs 
2 cups seedless raisins 
1 cup coarsely chopped pecans
 
Preheat the oven to 350°F. Grease or parchment line two 9x5x3-inch loaf pans. 
Stir together flour, soda, salt, cinnamon, nutmeg, ginger and allspice; set aside. 
Combine sugar, pumpkin, oil, water and eggs in the large bowl of an electric mixer, set on medium speed. Gradually add flour mixture, mix well. Stir in raisins and pecans. 
 Loaves made with kabocha squash purée
Pour batter evenly into prepared pans. Bake 1 hour or until the loaf tests done. (*Remember, when I used squash purée my loaves needed 1½ hours to cook through. Test with a cake tester before removing from the oven.)
Cool for 10 minutes in the pans set on cooling racks, then remove from pans and thoroughly cool on racks.

*Chef's Note: These loaves freeze well. I wrap each slice individually in plastic wrap, then put in a large freezer bag. Quick and easy to pack for the ferry or to use in school lunches! 


Till next week ... Bon Appétit!

Photos by Sally Rae
Recipe by Sally Rae ~ from 'For the Love of Food'

Saturday, October 10, 2015

What is a Cooking Oil 'Smoke Point'?

In cooking terminology; the 'smoke point' of an oil or fat is the temperature when heated, where a bluish smoke becomes visible. Every cooking fat be it butter, lard or oil has a smoke point. 

To produce an oil with a high smoke point; manufacturers use refinement processes like bleaching, filtering and high temperature heating to extract and eliminate the extraneous compounds. This produces a neutral flavored oil with a longer shelf life and a higher smoke point.  

Traditionally, oils are extracted from nuts and seeds through mechanical crushing and pressing. If bottled immediately, these are cold-pressed, raw or 'virgin' oils. This unrefined oil is packed with enzymes, minerals and compounds that don't respond well to heat. They retain their natural flavor and color but are also susceptible to rancidity. These oils are best for drizzling, dressings and low temperature cooking.

Now, when it comes to cooking with fats; a flavorful, raw oil or pool of butter that is smoking is a danger zone! When heated past its smoke point, fats start to break down releasing free radicals and a substance called acrolein, the chemical that gives burned foods their acrid flavor and aroma. Another side effect is the fat degrades, it gets closer to its flash point, producing ignitable gasses that you don't want hovering over an open flame. That said, if your oil starts to smoke, unless you are using a high smoke point oil, carefully remove it from the heat immediately. Once it has cooled, give it a sniff and taste and if it has developed unpalatable flavors, discard it and start with a new batch.

For high temperature cooking use fats with a smoke point at or above 400F. Methods of high temperature cooking include; pan searing where the fat is heated until it just starts smoking before adding the meat, deep-frying where the smoke point of the fat should be at least 50 degrees higher than your frying temperature and stir-frying with a wok where a thin layer of smoking hot oil is used to lubricate the food and brown it while retaining a crisp, fresh crunch.

The higher a fat's smoke point, the more versatile use in different cooking methods. A few other things to watch out for... hitting a smoke point further lowers that smoke point. This means that if your deep-frying fat has been smoking, you will not be able to successfully reuse it as many times. Refrigerate flavorful oils like sesame, avocado and walnut to delay rancidity. Store oils tightly sealed in a cool, dark place. Do not keep oil over the stove, the extra heat can lead to rapid rancidity.

SMOKE POINT INDEX OF FATS AND OILS

Most grocery stores carry a wide variety of oils
Safflower Oil (refined) ~ 510F
Avocado Oil ~ 500F
Rice Bran Oil ~ 490F
Sesame Oil (refined) ~ 450F 
Peanut Oil (refined) ~ 450F
Clarified Butter (ghee) ~ 450F
Corn Oil (refined) ~ 450F
Grapeseed Oil ~ 420F
Lard ~ 375F
Duck Fat ~ 375F
Butter ~ 350F
Coconut Oil ~ 350F
Extra-Virgin Olive Oil ~ 320F
   
Till next week ... Bon Appétit!
 

Photo by Sally Rae 

Monday, September 28, 2015

Roasted Winter Squash Lasagna

With fall upon us, the cooler temperatures have me craving hearty, comfort food. This lasagna recipe fills the bill and is also very versatile... enjoy the full flavors and rich goodness of pasta, Italian sausage, veggies and cheese. Substitute kale for the spinach or omit it all together for a kid friendly version. For an even more kid friendly version; puree the roasted squash... or change it up to be vegetarian by omitting the sausage. Try any version as a lovely side dish for Thanksgiving Dinner or your next pot luck gathering.

Before you start though, a tip about 'no-boil' noodles. 'No-Boil' pasta is partially cooked then dried before packaging. Recipes that use no-boil noodles have a more liquid sauce and are cooked tightly covered to help the noodles soften while cooking. If you only have the traditional lasagna noodles; cook them, then make a thicker sauce because they won't absorb as much of the sauce as the no-boil noodles.

ROASTED WINTER SQUASH AND SAUSAGE LASAGNA       Yield: 6-8 servings
Garlic and fresh sage complement the fall flavors in this hearty dish.

For the vegetables:
1 x 3 lb. kabocha type (or butternut) squash...
    -peeled, seeded and cut into 1/2" dice (about 8-9 cups)
2 Tbsp. extra virgin olive oil
Sea salt and freshly ground black pepper

For the sausage:
Extra virgin olive oil
1 x 500g. pkg. Sweet Italian sausage -remove casings
1 medium yellow onion -small dice
1 x 300g. pkg. frozen spinach...
    -thaw, squeeze out excess liquid, and chop

For the bechamel:
1/4 cup butter
1 Tbsp. finely minced fresh garlic 
10 sage leaves -sliced very thin
1/4 cup all purpose or unbleached flour
4 cups whole milk  
Sea salt and freshly ground black pepper
Pinch freshly grated nutmeg -optional

For the lasagna:
Butter for the baking dish
1 cup grated extra old white cheddar (about 4 oz.)
1-1/2 cups grated mozzarella cheese (about 6 oz.)
1/2 cup grated Parmesan cheese (about 2 oz.) 
12 no-boil lasagna noodles

To roast the squash; preheat oven to 425 F and oil a large bake sheet with a drizzle of olive oil, set aside. In a large bowl, toss the diced squash with olive oil until well coated. Season with salt and pepper and spread in one layer on prepared bake sheet. Roast squash in oven 10 minutes. Stir and roast another 10-15 minutes or until tender and beginning to turn golden. Remove from the oven and set aside.

While the squash is roasting; heat a drizzle of olive oil in a large skillet. Crumble the sausage meat into the pan, brown and break it up into small bits with a wooden spoon as it cooks. Add the onion and cook until soft then add the chopped spinach and mix well. Remove from heat and set aside.

While the sausage cooks make the bechamel; melt butter in a saucepan over medium heat. Add minced garlic and sage. Cook for about one minute but do not brown the garlic. Stir in the flour to make a roux and cook for another minute. Slowly whisk in milk. Season with salt, pepper and nutmeg if using and bring to a boil. Whisk often to prevent lumps. Reduce the heat, continue to whisk often and allow to simmer until the sauce thickens, about 5 minutes. Taste and adjust seasonings.  

Position a rack in the center of the oven and reduce the temperature to 375 F. Lightly butter a 13"x9"x2" glass baking dish. Toss the cheeses in a bowl, set aside 1/2 cup for topping. 

Assembly; evenly coat the bottom of the baking dish with 3/4 cup of the bechamel. Lay 3 lasagna noodles side by side on top. Cover with 1/3 of the squash then 1/3 of the sausage and sprinkle with 1/3 of the cheese mix. Drizzle 3/4 cup of sauce over the layers then repeat layering 3 more times using 3 noodles, squash, sausage, cheese and sauce. Be sure to get the ingredients evenly distributed and to the sides of the dish. Top with remaining 3 noodles and cover with the remaining bechamel.

Tightly cover the baking dish with foil and bake lasagna for 40 minutes. Sprinkle with the reserved 1/2 cup cheese and continue baking uncovered 15 minutes longer until the sauce bubbles and the top is golden. If needed, place under the broiler until browned, about 2 minutes. Let the lasagna stand for 15 minutes before serving.
Serve with a green salad along side.


Till next week ... Bon Appétit!


Photo by Sally Rae     

Sunday, September 13, 2015

September Strawberries

Seascape Strawberries weigh in at 1/4 oz. per berry!
I have 2 raised beds of 'Seascape Strawberry' plants in the garden. Each bed measures 4'x10'x12" deep, with three rows of strawberry plants per bed. This year the old plants are in their third year of production and will be pulled out and replaced for next summer. The second bed was planted last fall so this summer was their first year.

As mentioned in previous strawberry posts (to view, click on 'Strawberries' under Labels), this incredible day neutral (ever-bearing) variety has a small June crop. The impressive production starts in August. The photo above was taken August 12th, 2015. The late summer crop starts with huge berries and even though they get a bit smaller, they are still an impressive size for the time of year. These sweet, juicy beauties weighed in at 1/4 ounce each! As long as the sun was shining, I picked on average 2-1/4 pounds, every second day through August! 
In my garden ~ September 11th, 2015

Our September weather is cooling down a bit. I now pick every 4th day, with the same average of about 2 pounds per picking. If the days continue to be sunny and dry, I will be able to pick fresh, sweet, ripe berries until mid-October. The photo at right, of the strawberry patch, is more reminiscent of June rather than September! The plants are still prolific with flowers and developing berries. 

Last October was the first year of ripe, fresh berries because of the dry weather. If the rain starts, the green berries will not ripen but instead get brown spots that eventually turn to mold. I have tried to ripen the berries that are a bit pink but it is useless. When that happens, I cut all the plants down to about 2" and straw mulch around the crowns and between the rows. When winter sets in, I spread a thin layer of straw over the plants and top the whole bed with maple leaves for winter protection.
Strawberries are my favorite summer fruit, so my fingers are crossed for dry weather and another month of fresh berry picking!

Till next week ... Bon Appétit!


Photos by Sally Rae 

Wednesday, September 2, 2015

Healthy After School Snacks

Back to School is just around the corner... time to start gearing up with some new ideas for after school snacks. Here are a few kid friendly, fast and healthy bites to try! 

HUMMUS PINWHEELS      Yield: about 30 pinwheel bites
I use the smaller 8" wraps for these pinwheels. When cut into 1" pieces they are small enough for tiny fingers and just a bite for adults! 

6 Ancient Grain tortilla wraps
1-1/2 cups hummus 
6 small romaine leaves
1 large carrot, grated
1/4 cup fresh basil, chiffonade*

Without overlapping, lay the 6 tortilla wraps on a cutting board or clean counter. Place a #20 scoop (or about 1/4 cup) of hummus on each wrap and spread evenly to the edges. On top of the hummus, place one lettuce leaf at the bottom edge of each wrap. On top of the lettuce divide the grated carrot then sprinkle with basil evenly among the 6 wraps.
To roll the wraps; fold the left and right side of each wrap inward about 1-1/2 inches. Then starting from the bottom tightly roll the wrap upward keeping the layers intact. Cut wraps into 1-inch pieces and serve.  
*Chef's Tip: The culinary term 'chiffonade' means to cut into very fine strips or ribbons. For basil; stack the leaves and roll up like a cigar. Hold tightly and slice very thin. 


MOM'S KALE CHIPS
Kale has an impressive nutrient content. It is a cold-hardy plant with a continual harvest that can last right through snow. This is a fast and fun way for kids to eat greens!
 
1 large bunch fresh kale
Extra Virgin Olive Oil
Sea salt, optional
Freshly ground pepper, optional
Granulated garlic, optional

Line several bake sheets with parchment paper and set aside; preheat oven to 350F. Rinse kale, allow to dry on a cotton towel. Remove leaves and discard the coarse stem. Tear leaves into small pieces, about the size of a potato chip and place in a large bowl. Sprinkle with a small amount of olive oil and gently toss. Sprinkle with a bit of salt, pepper or your desired seasoning and toss well. You don’t need much salt or seasonings, just enough to make them tasty. Scatter them on the parchment paper lined sheets. Bake in the preheated oven for about 5-8 minutes; they should be crispy but not dark in color.


DATE n' NUT BALLS         Yield: 15 balls with #50 scoop
'Cacao Nibs or Powder' is chocolate in it's most natural form... which is the cacao bean (or nib); a bitter, nutrient packed superfood that is a healthful addition to these snacks. The nib is made from breaking the larger bean into smaller pieces. Cacao powder is made by pulverizing the raw or roasted nib into a powder. Cacao powder contains more fiber and calories than cocoa powder since more of the nutrients from the whole bean are still intact.   

1/4 cup pitted dates (4 large)
1/4 cup cacao powder
2 Tbsp. cashew, almond or macadamia nut butter
1/2 cup whole cashew, almond or macadamia nuts
Pinch sea salt

Pulse or run the dates in a food processor, add all remaining ingredients and run until the nuts are still slightly chunky. Scoop using a heaping #50 scoop (or a generous tablespoon). Roll into balls and place in the fridge or freezer for 20-30 minutes. Store in an airtight container in the fridge.

Till next week ... Bon Appétit!


Photos by Sally Rae 

Thursday, August 20, 2015

It's Panzanella Time!

'Panzanella' is a Tuscan salad of stale bread and tomatoes; dressed with olive oil and vinegar, sometimes onions and basil are added. 
 'Yellow Hawaiian' Heirloom Tomato
This salad is a delicious way to use up a surplus of fresh tomatoes. Also, it's a great addition to a potluck dinner because it does not need to be refrigerated. 

I was at the Denman Island Farmer's Market last Saturday. There was a huge assortment of beautiful Heirloom tomatoes available in every color and shape imaginable (for a tomato). I also found a wonderful little bag of 'haricot vert' (skinny, little French green beans) that immediately called out to me ...'Bean Bundles'! Haricot verts are more tender with a more complex flavor than regular green beans.

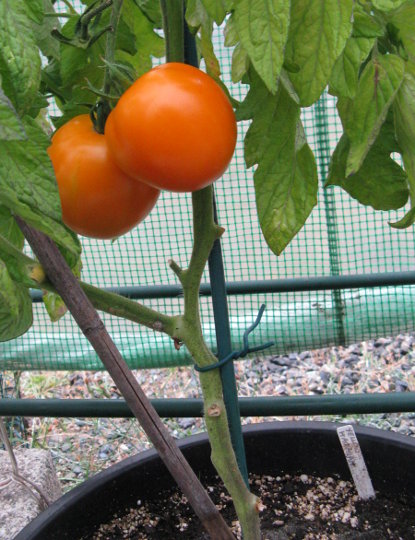
With that inspiration, I came home and picked both red and yellow Heirloom tomatoes from my greenhouse. The week old bread that was destined for croutons conveniently became the bread for my salad instead.... and it became Panzanella time in my kitchen! The Bean Bundles are an adorable addition as a vegetable accompaniment and edible garnish.

Heirloom Tomato Panzanella with Bean Bundle
Heirloom Tomato Panzanella with 
       Bean Bundles    Yield: 6 servings
Salad;
6 large, fresh, ripe Heirloom Tomatoes;
     diced into 1/2" pieces 
1/2 large, sweet or red onion, thinly sliced
1/4 cup thinly sliced fresh basil leaves*
4 Tbsp. balsamic vinegar
1/2 cup extra virgin olive oil
1 tsp. freshly ground black pepper
1 tsp. sea salt
1 tsp. granulated sugar
6 cups day old, dense, crusty bread;
     cut into 1" cubes 

In a large bowl, whisk together balsamic vinegar, olive oil, pepper, salt and sugar. Add diced tomatoes, onion and basil; toss gently to combine. Set aside to allow the flavors to marry for about 10 minutes.
Add bread; toss well to coat. If the bread seems dry, sprinkle with a tablespoon or two of tomato water. Salad will hold for several hours at room temperature before serving. 
*Chef's Tip: to slice basil; stack the leaves and roll up like a cigar. Hold tightly and slice very thin into a 'chiffonade'.

Bean Bundles;
36 haricot vert or thin green beans; if too thick, cut in half lengthwise
6 strips of carrot or green onion tops for ties 

To prepare the ties; use a vegetable peeler and peel long strips of carrot OR use the tops of green onions. Place in a shallow container and pour boiling water over them to soften; drain and rinse under cold water. Cut into narrow strips. Tie groups of 6 beans into bundles, cutting off the ends of the ties.
Place a vegetable steamer over boiling water. Gently place the bundles in the steamer basket and steam for 8 minutes. Serve as a vegetable accompaniment. 

Till next week ... Bon Appétit!


Photos by Sally Rae 

Friday, August 14, 2015

Barding and Larding ...plus Tying a Roast

To 'Bard' and 'Lard' are culinary techniques; the purpose of either method is to introduce fat to meat, poultry or game.

#1 Bard and start with a slip knot
'Barding' is the culinary technique of wrapping meat, poultry or game in thin slices of fat, bacon or salt pork before cooking. The main purpose of barding is to maintain moisture of the meat. It also helps keep it from overcooking and adds flavor.

'Larding' is the culinary technique of adding thin strips of salt pork or fat into meat with a special larding needle. It is a classical technique that dates back to when meat was much leaner and dryer than today. It is essentially a way of creating artificial marbling. Modern meat has much more marbling so this technique is not used much anymore. That said, larding can be useful for preparing lean game meat such as venison, that might otherwise dry out when roasted. The main purpose of larding is to enhance the moisture of the meat and add flavor. 
#2 Continue to loop and keep tension

I am sure many of you have wrapped a lean chicken breast or pork tenderloin in bacon not knowing that you were 'barding' the meat! The 'Bacon Wrapped Pork Tenderloin' in the photos is from 'For the Love of Food' page 217. This idea sprung from my original favorite that used a boneless, skinless, turkey breast; seasoned, wrapped in bacon and tied with butchers twine to even out the shape and hold the bacon in place. The turkey breast was then cooked on a rotisserie spit in a barbecue with a hickory smoke pouch. This combination of techniques turned what could be an unappetizing, dry, piece of meat; into a tender, juicy and flavorful delight!

Learning to tie a roast can be a challenge at first. I would suggest using a rolled up hand towel instead of raw meat to practice. There are two main reasons why you would tie a piece of meat. The first is if you have an uneven piece of meat and you want to even out the shape so it will cook more evenly. The second is if you have a rolled and stuffed piece of meat or you have used the barding technique. Tying a roast will help the roast cook evenly and carve nicely.  

#3 Ready to Roast
Now back to that pork tenderloin... after barding, the meat is tied using a long piece of butchers twine rather than a bunch of short pieces. Tie a slip knot, leaving a short end of string to tie off later (photo #1). Then place the loop around one end of the roast and tighten just enough to hold, but not cut into the meat. (It may help to use toothpicks to hold the bacon in place while you work on your tying skills.) Keep tension on the string but don't pull too hard. Continue to loop and move the string along the roast to the other end (photo #2). Flip the roast over and thread the long end of the string under the loops along the length of the underside of the roast. Flip the roast over again and adjust the tension. Bring the long string around the end of the roast and tie to the short end of string that was left on the first slip knot. Cut off the excess string (photo #3). 

At this point, I tightly wrap the tenderloin in plastic wrap and refrigerate for at least 4 hours. This allows some of the bacon cure and flavor to penetrate the roast. This is why the cooked tenderloin still looks pink. Always use a meat thermometer for the true internal temperature of cooked meats and poultry. Remove from the oven and tent the meat with foil and allow to rest for 10-20 minutes before carving. This rest time allows the juices to re-distribute back into the meat for a tender, juicy result. Carefully cut the butchers twine with kitchen shears and remove all strings before carving. 
Bacon Wrapped Pork Tenderloin with Maple Mustard
Till next week ... Bon Appétit!

Photos by Sally Rae