Thursday, August 20, 2015

It's Panzanella Time!

'Panzanella' is a Tuscan salad of stale bread and tomatoes; dressed with olive oil and vinegar, sometimes onions and basil are added. 
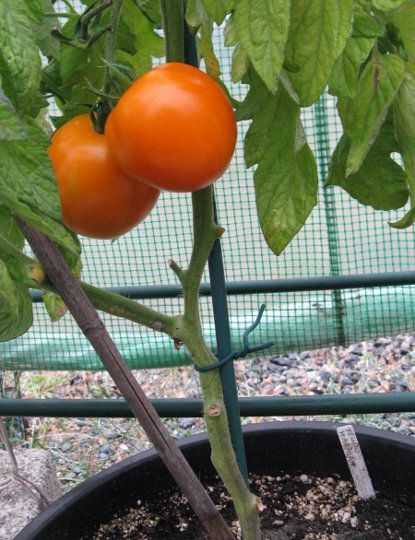
 'Yellow Hawaiian' Heirloom Tomato
This salad is a delicious way to use up a surplus of fresh tomatoes. Also, it's a great addition to a potluck dinner because it does not need to be refrigerated. 

I was at the Denman Island Farmer's Market last Saturday. There was a huge assortment of beautiful Heirloom tomatoes available in every color and shape imaginable (for a tomato). I also found a wonderful little bag of 'haricot vert' (skinny, little French green beans) that immediately called out to me ...'Bean Bundles'! Haricot verts are more tender with a more complex flavor than regular green beans.

With that inspiration, I came home and picked both red and yellow Heirloom tomatoes from my greenhouse. The week old bread that was destined for croutons conveniently became the bread for my salad instead.... and it became Panzanella time in my kitchen! The Bean Bundles are an adorable addition as a vegetable accompaniment and edible garnish.

Heirloom Tomato Panzanella with Bean Bundle
Heirloom Tomato Panzanella with 
       Bean Bundles    Yield: 6 servings
Salad;
6 large, fresh, ripe Heirloom Tomatoes;
     diced into 1/2" pieces 
1/2 large, sweet or red onion, thinly sliced
1/4 cup thinly sliced fresh basil leaves*
4 Tbsp. balsamic vinegar
1/2 cup extra virgin olive oil
1 tsp. freshly ground black pepper
1 tsp. sea salt
1 tsp. granulated sugar
6 cups day old, dense, crusty bread;
     cut into 1" cubes 

In a large bowl, whisk together balsamic vinegar, olive oil, pepper, salt and sugar. Add diced tomatoes, onion and basil; toss gently to combine. Set aside to allow the flavors to marry for about 10 minutes.
Add bread; toss well to coat. If the bread seems dry, sprinkle with a tablespoon or two of tomato water. Salad will hold for several hours at room temperature before serving. 
*Chef's Tip: to slice basil; stack the leaves and roll up like a cigar. Hold tightly and slice very thin into a 'chiffonade'.

Bean Bundles;
36 haricot vert or thin green beans; if too thick, cut in half lengthwise
6 strips of carrot or green onion tops for ties 

To prepare the ties; use a vegetable peeler and peel long strips of carrot OR use the tops of green onions. Place in a shallow container and pour boiling water over them to soften; drain and rinse under cold water. Cut into narrow strips. Tie groups of 6 beans into bundles, cutting off the ends of the ties.
Place a vegetable steamer over boiling water. Gently place the bundles in the steamer basket and steam for 8 minutes. Serve as a vegetable accompaniment. 

Till next week ... Bon Appétit!


Photos by Sally Rae 

Friday, August 14, 2015

Barding and Larding ...plus Tying a Roast

To 'Bard' and 'Lard' are culinary techniques; the purpose of either method is to introduce fat to meat, poultry or game.

#1 Bard and start with a slip knot
'Barding' is the culinary technique of wrapping meat, poultry or game in thin slices of fat, bacon or salt pork before cooking. The main purpose of barding is to maintain moisture of the meat. It also helps keep it from overcooking and adds flavor.

'Larding' is the culinary technique of adding thin strips of salt pork or fat into meat with a special larding needle. It is a classical technique that dates back to when meat was much leaner and dryer than today. It is essentially a way of creating artificial marbling. Modern meat has much more marbling so this technique is not used much anymore. That said, larding can be useful for preparing lean game meat such as venison, that might otherwise dry out when roasted. The main purpose of larding is to enhance the moisture of the meat and add flavor. 
#2 Continue to loop and keep tension

I am sure many of you have wrapped a lean chicken breast or pork tenderloin in bacon not knowing that you were 'barding' the meat! The 'Bacon Wrapped Pork Tenderloin' in the photos is from 'For the Love of Food' page 217. This idea sprung from my original favorite that used a boneless, skinless, turkey breast; seasoned, wrapped in bacon and tied with butchers twine to even out the shape and hold the bacon in place. The turkey breast was then cooked on a rotisserie spit in a barbecue with a hickory smoke pouch. This combination of techniques turned what could be an unappetizing, dry, piece of meat; into a tender, juicy and flavorful delight!

Learning to tie a roast can be a challenge at first. I would suggest using a rolled up hand towel instead of raw meat to practice. There are two main reasons why you would tie a piece of meat. The first is if you have an uneven piece of meat and you want to even out the shape so it will cook more evenly. The second is if you have a rolled and stuffed piece of meat or you have used the barding technique. Tying a roast will help the roast cook evenly and carve nicely.  

#3 Ready to Roast
Now back to that pork tenderloin... after barding, the meat is tied using a long piece of butchers twine rather than a bunch of short pieces. Tie a slip knot, leaving a short end of string to tie off later (photo #1). Then place the loop around one end of the roast and tighten just enough to hold, but not cut into the meat. (It may help to use toothpicks to hold the bacon in place while you work on your tying skills.) Keep tension on the string but don't pull too hard. Continue to loop and move the string along the roast to the other end (photo #2). Flip the roast over and thread the long end of the string under the loops along the length of the underside of the roast. Flip the roast over again and adjust the tension. Bring the long string around the end of the roast and tie to the short end of string that was left on the first slip knot. Cut off the excess string (photo #3). 

At this point, I tightly wrap the tenderloin in plastic wrap and refrigerate for at least 4 hours. This allows some of the bacon cure and flavor to penetrate the roast. This is why the cooked tenderloin still looks pink. Always use a meat thermometer for the true internal temperature of cooked meats and poultry. Remove from the oven and tent the meat with foil and allow to rest for 10-20 minutes before carving. This rest time allows the juices to re-distribute back into the meat for a tender, juicy result. Carefully cut the butchers twine with kitchen shears and remove all strings before carving
Bacon Wrapped Pork Tenderloin with Maple Mustard
Till next week ... Bon Appétit!

Photos by Sally Rae

Friday, August 7, 2015

Mid Summer's Harvest and Recipe

It's hard to believe we are already into August! Although with the heat, mulching and amount of time spent hand watering, it already feels like summer has been a long haul. The cooler evening temperatures and light rain this week is a welcome change!
Beyond all that, it certainly has been an interesting year so far with my experimental container garden. I am already making notes and lists of what works and which vegetables are just not worth the time, space and water! Here is my latest short list of the good, the bad and the ugly...
Corentine Pickling Cucumber

The Corentine Pickling Cucumbers from William Dam have been beyond delightful! Yields are high, fruits crisp and uniform in size with small spines. I have already fermented 6 quarts of Garlic Dill Pickles with the 'Perfect Pickler'....although a few jars were topped up with cauliflower or daikon radish slices. Next year I will start more of these, my new favorite for pickles and salads!
Burgundy, Yellow and Green Bush Beans

I grew my usual three colors of bush beans; Royal Burgundy, Rocdor Yellow and Delinel Green from William Dam. Planted them heavily in three long, narrow planters (that fit over a 2x6" railing like a saddle), but left them on the ground, partially shaded beside the greenhouse. I did not hold much hope because of how shallow the soil was in the center of the planter. To my surprise, these have been one of the most worthwhile vegetables, especially the Rocdor and Delinel. Producing about 1lb. 6oz. of tender, straight beans per picking. More than we could eat for a meal, so I have enjoyed a few good feeds of my favorite bean salad.
Sunshine and Small Sugar Winter Squash

I have been spoiled with incredible winter squash harvests the past few years. Sunshine from William Dam, is a winter squash I cannot imagine living without. I just took the last one from my storage room from the 2014 harvest. Worried it would not be edible, it had a small mold spot starting at the blossom end. The monster sized squash was delicious roasted and I even had enough to experiment with 'dehydrated squash strips' for doggie snacks!

Winter squash with pruned foliage
Sad to say, one of my most disappointing trials has been the winter squash. I had hoped they would trail up the stairs which they did at first. However, with pollination problems and the dropping fruit I mentioned last week, I have already pruned the plants back. Again, I was too ambitious with 2 plants per pot, and with the weather, even though I fertilized heavily, the squash are very small and yielded only one per plant. This week I pruned off all excess foliage leaving just the fruit attached and a few feet of vine beyond.
Ripe Desert King Figs

I have heard comments that it is a strange year for figs. Mine ripened about 3 weeks early and needed lots of water to the surrounding roots, not just at the trunk of the tree. I discovered this after finding dry, unripe figs falling to the ground. Deep watering a larger area surrounding the trunk did the trick. As mentioned, they ripened early; delicious, delicate and dripping with honey (notice in the photo). Unfortunately wasps and ants caused a lot of damage which I have not usually found to be a problem in the past. So I would agree, a strange fig year with an early, lower yield due to the drought and pests. 
The recipe below uses fresh, ripe figs and I must indulge at least once through fig season!

PROSCIUTTO ROASTED FIGS   Yield: 12 figs 
This is an all time favorite recipe of mine... from 'For the Love of Food'!

12 fresh figs
Prosciutto Roasted Desert King Figs
1/4 lb. Gorgonzola cheese
1 Tbsp. Cognac
1 tsp. cracked black pepper
12 thin slices prosciutto
1/3 cup honey
Fresh ground black pepper

Preheat oven to 400F. Cut into the figs half way, creating a 'pocket', being careful not to go all the way through. In a small bowl combine Gorgonzola, cognac and pepper. Mix together using a fork until well blended.  Stuff the figs with cheese mixture. Wrap prosciutto evenly around each fig to enclose it. If necessary, secure with a toothpick. Stand figs on a parchment lined bake sheet. Bake until prosciutto melts slightly and forms a skin around the figs, 12-15 minutes. Transfer to a serving platter. Drizzle with honey and season with fresh ground black pepper. Serve warm or at room temperature. 

Till next week ... Bon Appétit!


Photos by Sally Rae

Thursday, July 30, 2015

Zucchini Tree?

The most talked about... and most photographed plant in my experimental container garden this summer, has been my 'Deema Zucchini'. Pruned and tied to grow up a wooden stake, eventually somewhat resembling a tree. 
Deema Zucchini
I discovered this method on a square foot gardening video and decided to give it a try. Initially, I was going to use a
'space saver' variety in my container, but that type of plant will not work with this method. You need a variety that produces a trailing vine, so you can stake it vertically. I cannot live without a zucchini plant, so was thrilled with something new to try in a confined space. This way you also prevent those ginormous gourds that are found in the field or garden at final harvest.

I started the Deema Zucchini from seed, purchased through William Dam. It is a hybrid, pale green and is high yielding. When the seedling was transplanted to the container, I placed a heavy wooden stake right beside it immediately so as not to disturb the root system later. As the vine grows, begin tying it to the stake to encourage upright growth. At first this was a bit awkward because the plant is too bushy. Remove any of the leaves from the ground level, but leave the leaf immediately below the first female bud. Once that zucchini is mature and picked, remove all the leaves from below it. Continue this method for each zucchini; when picked, remove all the leaves that were below it. Eventually the stem becomes easier to stake up and it kind of looks like a zucchini tree!

I have had some degree of difficulty with pollination and dropping of female flowers before they even open with my squash this year. Perhaps I was a bit too ambitious putting 2 plants in one container.... or is it the heat... or my watering schedule... or all of the above?

Lack of pollination shows up as a squash that starts to grow a little, then shrivels and drops off. If the plants are not successfully pollinated by bees, it can easily be fixed if you hand pollinate the flowers. The female flower has a tiny fruit below the flower and the male blossoms have a straight stem and no fruit. To hand pollinate; pick an open male flower and gently peel back the petals. The pollen is like bright yellow dust on the center structure of the male flower. Dab the pollen onto the center structure of an open female blossom. That's all there is to it! Several female flowers can be pollinated by one male flower. 

My other problem has been that the tiny female flowers are turning brown at the tips and/or dropping off before they open. Linda Gilkeson writes that "...plants do this if they are carrying more flowers and fruit than they can sustain with the water or nutrients available to them. Excessive heat might also play a role." With our drought and my container garden experiment that makes sense. She also went on to mention that "...irregular watering causes the fruit to grow with narrower places along the length (it also happens with cucumbers)." And suggests that, "...a thicker mulch and more attention to watering will produce straight sided fruit without 'waistlines'." You will find her archived gardening tips at http://lindagilkeson.ca/gardening_tips.html

Till next week... Enjoy a safe, long weekend and Bon Appétit!


Photo by Sally Rae

Thursday, July 23, 2015

What the Heck is Gnudi?

The word 'Gnudi' comes from the Italian for 'nude' and refers to the idea of 'naked ravioli'.
Supposedly the ugly sister of Gnocchi... made luscious with ricotta and just a little flour instead of potatoes. The dumplings are light, delicate and soft, and melt in your mouth. Even better, they are very fast and easy to make... Ricotta Ravioli without the pasta and added carbs!
The trick to this recipe is getting the right amount of flour into the dough; you want enough to hold the dumplings together but not so much that they get heavy, and that can vary depending on the ricotta and egg. You may want to cook a test dumpling before shaping the rest of them. If it falls apart, stir in another tablespoon of flour or so.
With fresh basil and the greenhouse tomatoes ripening fast, this is a fresh, easy, summer dish. If your tomatoes are not yet ripe, use your favorite tomato sauce. The bottom photo of Basil Gnudi was served with last year's 'Roasted Tomato Sauce' from my freezer, (page 198 'For the Love of Food'). 
Next week I will feature the most talked about ... and most photographed... summer veggie in my container garden. Take a guess!

RICOTTA AND BASIL GNUDI       Yield: 2 servings or 4 servings as appies (about 18 dumplings)
These easy, delicate dumplings can be assembled and formed several hours before serving then cooked fresh in minutes. 
Portion, gently form dumplings and roll in semolina
Gnudi:
250g. fresh ricotta, *drained
1 oz. fresh, grated Parmesan cheese 
1 egg yolk
3-4 Tbsp. unbleached flour
Pinch of sea salt 
2 Tbsp. finely chopped, fresh basil
1/4 cup semolina

3-4 Tbsp. butter, divided
4 mini courgette, cut in half lengthwise
1 cup tomato sauce 
Grated Parmesan for serving
Fresh basil leaves for garnish

In a bowl combine; drained Ricotta, Parmesan, egg yolk, flour and salt until well mixed and smooth. Gently mix in basil. Using a #100 scoop (about a teaspoon), make a small test dumpling. Coat your hands with semolina and gently press the portion into a ball using the palms of your hands. Then slightly flatten to form an oval and roll gently in more semolina until it is evenly coated. At this point, cook the test dumpling in simmering, salted water until it floats. If it falls apart, stir in another tablespoon or so of flour. Then test one more dumpling, if you want. Continue to portion remaining gnudi into 16 balls and form into ovals, rolled in semolina. Place gnudi on a plate sprinkled with semolina. At this point they can be cooked or covered with plastic wrap and placed in the fridge for up to 4 hours.
To cook the gnudi; bring a pot of salted water to a boil. Reduce the water temperature, gently add half of the batch and simmer gently until they rise to the top and stay there for 1 minute, about 5 minutes total time. Transfer with a slotted spoon to a plate while you cook the second batch. 
Place a non-stick fry pan over medium-high heat, add 1-2 tablespoons butter. When bubbly, but not brown, add the courgette halves and brown both sides, remove to a plate. Add remaining butter and when bubbly add the gnudi, gently turning until golden brown. 
To serve; Warm the tomato sauce over medium heat, divide into serving bowls. Plate the gnudi and courgette into desired servings and garnish with basil leaves and grated Parmesan cheese.   

*CHEF'S NOTE: To drain Ricotta; line a colander with 3 layers of cheese cloth and set it in a bowl. Dump the ricotta into the lined colander and let it drain in the refrigerator for about 2 hours.

Till next week... Bon Appétit!

Photos by Sally Rae  

Friday, July 17, 2015

Garlic Harvest 2015

'Just pulled' garlic ~ 9th of July 2015
Our hot, dry spring and summer ...with a good amount of watering... has produced an impressive crop of garlic. Most of the heads are huge this year!
A few weeks before harvest, I stopped watering the garlic bed. A general rule of thumb is to not water after the third week in June. I also removed the straw mulch about the same time. Different gardeners have different rules of thumb regarding the best time to harvest. The dying back of leaves is only an approximate indicator. 
Several years ago, I took a gardening class through the Denman Island Community School from gardening guru, Annie Siegel. Her rule of thumb is, "It is ready to harvest when there are 5 skin wrappers remaining over the bulb." If the bulb is not well-wrapped, and the skins on the cloves are not intact, the garlic will not keep well. 
July 9th harvest ~ 5 skin wrappers
To count the garlic skins; pull one or two plants, insert your thumb nail into the neck, close to the bulb. Start peeling the skins, one at a time off of the cloves. I did a test pull on July 7th, taking one of each variety and both were very close to ready.The purple garlic had 5 skins and the white garlic had 5-6, good enough. I didn't want to risk leaving it in the ground with the possible threat of rain on the weekend.
Once the crop was pulled, I left it in the sun for a few hours. (There is conflicting opinion on this practice; some say garlic can get sunburned and change flavor when left in the sun... some suggest to leave it in the sun for half a day.) Then it is time to move it all into the shade to 'cure'. 
Raised off the ground, on a pallet, in the shade

In curing, the energy from the leaves goes into the bulbs as they dry. Remove any chunks of dirt from the roots, being careful not to bruise the garlic. Leave the roots on as they have a moderating effect on the drying rate. Drying out of direct light, in a warm, dry place with good air circulation is ideal. You want the bulbs to dry evenly, the wrappers to dry and the garlic retain its moisture. If you have a very large amount, the plants can be hung in bunches but you still need circulating air to reach all sides of the bulbs. An open shed in a breezy location is perfect. With either method, if you do not have enough air movement, use fans.
If the weather remains hot, dry and breezy; I carefully arrange the garlic on a pallet under cover. This keeps the garlic heads separated and raised off the ground for air circulation. My alternate method is to elevate old window screens off the floor in the shed or garage. The garlic is then spaced on the screens and fans are used for air circulation.
Alternate drying method - on screens with fans

Cleaning consists of trimming the leaves and roots and removing the dirty outer wrappers or skins. When the wrappers are dry, the roots and dirt will come off with a couple rubs with a glove leaving a short brush of roots. If they have picked up humidity, you may have to trim them with snips, leaving 1/2-1". The papery skins protect the garlic and keeps it fresh. Remove just the dirtiest outer layers. Cut the stem ends being careful not to cut the skins protecting the cloves and leave about 2-4 inches of dry stem. 
Separate and set aside the heads with the largest cloves for seed to be planted in the fall. In general, clove size is more important than bulb size as a determinant in future bulb size. Then place the remaining clean bulbs for storage in clean mesh bags or single layer in shallow boxes. Don't store damaged bulbs as they spoil easily. Separate any with soft cloves or otherwise damaged for immediate use. Store garlic at a cool, stable room temperature, 60-65F with moderate humidity and some air circulation is ideal.

Till next week... Happy Gardening and Bon Appétit!


Photos by Sally Rae

Friday, July 10, 2015

Wedding Cake Construction

Every significant celebration requires a special cake. This post will take your knowledge beyond the basic layer cake; to tiered, stacked works of edible art. These towering beauties are usually a wedding celebration centerpiece, but can also be made and served for anniversaries, ‘Sweet Sixteen’ parties and any other special occasion where the cake must be awe-inspiring and serve a crowd.
Wedding Cake with Crystallized Edible Flowers and Mint Leaves ~ by Sally Rae

The elements of a tiered cake are the cake itself, the filling, the icing and the decorations. Design and flavor should reflect the style of the occasion as much as the bride and grooms’ taste. The cake can be nearly any flavor; many people are shocked to learn that in my experience, carrot cake and chocolate cake are the top two flavors for weddings! The filling can be jam, lemon curd or whipped cream and berries to name a few. Most cakes are iced with buttercream or fondant. Icing is a matter of preference, but also a matter of practicality, especially as it relates to climate and season. The soft simplicity of ‘Basic Buttercream’ is very appealing but should be refrigerated up to 2-4 hours before serving. ‘Rolled Fondant’ produces a porcelain finish; it holds up well and even helps preserve cakes to keep them fresh when they are too large to refrigerate. The decoration and structure of the cake will determine its personality, from simple tiered to elaborately iced. Decorations can be made of marzipan or ‘Royal Icing’ (which dries very hard and is the best material for delicate, long-lasting decorations). A cake can be embellished with sugared or plain fresh fruit or flowers. If using flowers be sure to use only edible flowers that are pesticide and herbicide free from a reliable source. Cut flowers should be added as close to serving time as possible so they look fresh.

Basic baking skills and supplies, patience and time are all you need to create a beautiful, classic cake. Though no one skill is difficult to master, each step must be executed precisely; the cake layers must be perfectly level with straight sides, the wooden dowels must be perfectly even, and the icing has to be perfectly smooth. Be sure to practice and don’t be too ambitious with your first cake. Once you have mastered basic cake construction, you can experiment with more elaborate shapes, colors, decorations and designs.

The internal structure of the cake influences its appearance. With each tier more support is needed; dowels prevent the upper layers from crushing the lower ones, cake board separators are placed between each tier, and a strong base is used to move the cake. One role of the decorative piping is to hide the inner workings and seams between tiers. Each tier needs a cake board, to make your own; trace the cake pans onto a piece of heavy cardboard, cut out the shape, and cover completely with tin foil and saran wrap. Prepare the strong cake base before assembling the cake. The board should be at least two to four inches wider than the cake and able to support the full weight. (I have a clean, sanded sheet of plywood specifically for this job.) Cover the plywood cake base with fancy foil or spread with a thin layer of royal icing and let dry overnight. Trim the edge with ribbon, secured with a glue gun.

The cake layers and buttercream icing can be prepared and frozen for several weeks. Alternatively, the day before assembly, bake the cakes in parchment-lined cake pans and let them cool slightly. Remove cakes from the pans, and do not peel off the parchment. Once cooled completely, place each cake right side up on the cake boards. Cakes seldom bake level, even them out with a serrated knife to make it even all around, then wrap in plastic. Refrigerate for at least 6 hours or overnight; this makes the layers firm and easy to handle. The cakes can be frozen at his point. A 'Baker's Secret' is to brush the cut surface of the cake with a 'Flavored Sugar Syrup' before wrapping or 5-10 minutes before frosting. The syrup both moistens and flavors the cake.

To prepare the tiers; first place a small dollop of icing in the center of one cake layer. Place another cake board on top then invert the cake, remove the original base and parchment paper. The smooth flat bottom of the cake is now the top, and the dollop of icing prevents the cake layer from sliding off the cake board. Place on a turntable. Fill this cake and add the second layer; for a single cake, split a single layer by working a serrated knife through while turning. Brush the cut surface of the bottom half with 'Flavored Sugar Syrup’. Fill with icing, jam, lemon curd or whipped cream and berries. If using jam or lemon curd, first pipe a ‘dam’ of icing around the perimeter to keep the filling in place and ‘glue’ the layers together. Do not use too much filling or the cake will slip and slide. Replace the top layer, cut side down and brush with sugar syrup. Let sit five minutes. Ice the top and sides of the cake with a very thin layer of buttercream to give it a ‘crumb coat’, this seals the cake. Smooth the icing ...this will be covered with more icing later. Chill the tier about 30 minutes to set the icing or until it does not stick to you when you touch it. Repeat these steps for each tier. Give each tier a final coating of icing, using an offset spatula to smooth the top and sides of the cake tiers. The icing should be smooth and uniform, refrigerate the cake tiers. 

Insert a ¼-inch dowel rod vertically into the bottom tier of the cake, mark it at cake level, remove it and cut eight pieces to this length using clean garden pruning shears. These are the supports for the next tier. Hold an empty cake pan over the finished tier to determine placement. Use five cut dowels to form a circle one-inch in from the edge of the tier that will be placed on top. Use the other three dowels to form a triangle inside the circle. Do not place dowels directly in the center of each tier. Repeat this process for each tier, except the top one, using fewer dowels in different configuration, as the tiers get smaller. At this point the cakes can be refrigerated overnight.

To transport the tiers, place each one in its own box (with double sided tape between the cake board base and the box), and place on the flattest surface in the car out of direct sunlight. At the reception site, assemble and decorate the cake. Dab some icing onto the center of the cake base to keep the cake from moving and place the bottom tier on it. Add the next tier resting it on the dowels. Once all the tiers are stacked cut a dowel ¼-inch shorter than the height of the cake. Using a knife sharpen the end to a point, and with a mallet, gently drive the dowel through the center of all the cakes and cardboard bases using your finger to push in the end. To finish use a pastry bag fitted with a decorative tip to cover the seam between each tier, add the other decorations. Secure the cake top decoration with icing. The cake is now ready to be admired by the bride and groom and their guests. 

*CHEF'S NOTE: This assembly can be done at home before transporting the finished cake to the reception site. The finished cake is then loosely and completely wrapped in plastic wrap. Transportation then becomes a nerve wracking 2 person job consisting of a careful driver and passenger who holds the cake steady. For every fully assembled, tiered wedding cake I have sent out of my kitchen, I have witnessed a very nervous pair of folks who all successfully got the job done... and many who swore they would never want to do it again!!

FLAVORED SUGAR SYRUP
This syrup will moisten the cake and add a subtle flavor. 

1½ cups granulated sugar
1 cup water
3 Tbsp. liqueur -Grand Marnier, Frangelico, Kirsch
OR try...
3 Tbsp. citrus zest or 4 Tbsp. dried Hidcote lavendar 

In a small saucepan combine sugar, water and zest or lavendar if using. Set over high heat; boil until the sugar dissolves. Remove from heat, strain and cool completely before using. Stir in liqueur if using. Brush cake layers with syrup and let stand 5 minutes before frosting.

Syrup can be made 10 days prior, store in an airtight container in the fridge.

BASIC BUTTERCREAM ICING   Yield: about 7 cups icing
This recipe makes a large batch of icing. The unused portion can be packaged in 1 or 2 cup containers and frozen for up to 4 months. To use, defrost in the fridge; bring to room temperature and re-whip the icing before using.

1 lb. (2 cups) butter, softened 
8 cups confectioner’s (icing) sugar, sifted 
½ cup whipping cream 
2 Tbsp. pure vanilla extract

Beat the butter on an electric mixer fitted with a paddle attachment until light and fluffy. Gradually add the icing sugar and cream alternatively, beating well after each addition. Add flavouring and beat well.

*VARIATIONS* 
  Almond ~ substitute 1½ Tbsp. almond essence for vanilla
Citrus ~ substitute 2 Tbsp. pure lemon or orange extract for vanilla 
     Coffee ~ dissolve 1½ Tbsp. instant espresso coffee in the cream before adding    
    Chocolate ~ beat in 1 cup sifted cocoa powder and 2 Tbsp. whipping cream

Till next week... Bon Appétit!


Wedding Cake, Crystallized Flowers and Mint by Sally Rae
Photo by Sally Rae