Showing posts with label Fermenting Vegetables. Show all posts

Tuesday, January 28, 2020

Winter Garden Harvest

This was my third year growing Lennox Organic Cabbage, needless to say I'm thrilled with the quality of this variety and would highly recommend it. I start seedlings for both summer and winter cabbage harvest and this is the second year that I've made my Garlic and Dill Pickle Sauerkraut in January before the weather turns cold. For the full story and process check out my post from January 2019, 'January Harvest and Sauerkraut Hack'.  
Second day of snow ~ Jan. 16th, 2020
This year our crazy cold snap and 22" of snow came early. I didn't mind the first few days with -8C temps, the snow was fluffy and light. By the third day we were looking at clearing heavy, wet, BC snow that was about a foot deep!! I picked my winter cabbage on the 12th of January and unfortunately the core was already frozen. 
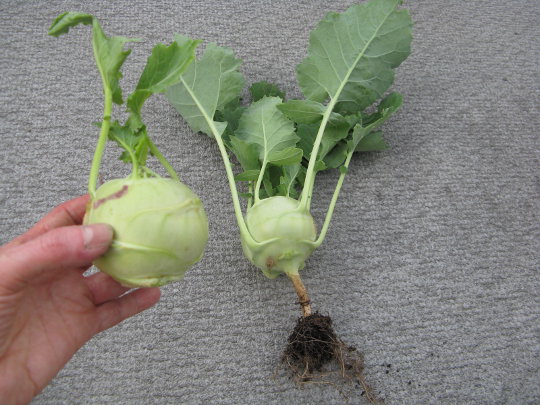
Frozen core and cabbage tip burn
I also found a new problem called 'cabbage tip burn'. This is new to me and my research shows it is the result of mineral uptake, watering and high temperatures. Which explains why the cabbage isn't fully affected, it seems only on the summer growth. A whole new learning curve for me... Interesting, the smaller cabbages were not affected.


Lennox Cabbage harvest ~ January 12th, 2020
I had 23 pounds of cabbage to start with, and all the waste and trim was left out for the hungry resident deer. It was a very time consuming process to clean the cabbage and remove as much of the black tips as possible. It isn't harmful, I just did not want it to affect my kraut fermentation and storage in any way!

When all was said and done, I had over 6 quarts for the first ferment with dill weed and minced garlic added. After 8 days I dumped all the kraut into a very large, sterilized stainless steel bowl and mixed in 2 quarts of thinly sliced, fermented dill pickles I made last summer. Then the mixture was packed again into jars and topped up with a new brine ... a mixture of the original kraut brine and dill pickle brine. 
These jars were then left to ferment
8 Quarts of finished Garlic & Dill Pickle Kraut
for another 4-5 days. After that time the flavor and texture were right, so the fermenting lids removed, storage lids put on and the jars stored in the fridge.
I had just finished eating last years batch so timing was good. This is a long and time consuming process but always worth the effort.
1st winter carrot harvest ~ January 25th, 2020
The cabbage was brought in before the snowfall and cold temps. The rest of the garden (kale, carrots, beets, strawberries and garlic) were covered with straw and maple leaf mulch to protect from the cold and snow. 
Just 3 days ago I removed the mulch from a small section of the first planted carrot bed and pulled the first winter carrots ... amazing!! Not sure if you recall, I had stopped growing carrots and parsnips because of the problems with carrot rust fly. Last summer I was determined to experiment and go through the arduous process of keeping the carrot beds covered with remay until late October. I'm thrilled to announce it worked! The carrots are clean, insect free, sweet, juicy, crunchy goodness!

After growing up in Alberta, I'm always so amazed and grateful for the food we can grow and harvest 12 months of the year here on the West Coast. The kale is small but so sweet after the cold weather and the garlic has poked through the mulch with shoots about 3" tall now. I've still got lots of carrots and some beets in another bed that were planted the end of June 2019. If the weather warms up too much, they will start to get 'hairy' and tough so they'll have to be pulled, washed and stored in the fridge. Not a problem, these carrots are worth the effort ... I love my winter garden harvest!

Until next time... Happy Winter Gardening and Bon Appétit!

Photos by Sally Rae
Garlic and Dill Pickle Sauerkraut by Sally Rae 

Thursday, January 17, 2019

January Harvest and Sauerkraut Hack

I haven't grown cabbage for about 5 years, with my new Paleo Diet and the need for probiotics I decided to plant LOTS of cabbage in my 2018 garden. I got some healthy bedding plants of a good size from Pat at Corlan Vineyard and Farm. The Danish Ballhead is an heirloom variety first introduced in 1887. When I was a youngster helping my Uncle on the Edmonton City Market, I still remember the Ukrainian grandmas wanting only Danish Ballhead. They make excellent sauerkraut! They are supposed to be winter hardy, not sure what happened with mine, maybe they were too mature by the fall. The first 3 Danish Ballhead I used for kraut in the fall were beautiful, huge, heavy, crunchy, blemish free. They made incredible kraut in my initial experiment of 'Garlic and Dill Pickle Sauerkraut' in November.
Unknown variety, Danish Ballhead and Red Russian Kale
I left 2 heads in the garden, the last Danish Ballhead in the photo was picked January 3rd, 2019. Late last year we had heavy frost, so I mulched maple leaves around and over the cabbage heads. The 2 unknown variety (Lennox Organic-See Jan. 28th comment below) on the left are incredible as seen in the photo. The Danish Ballhead was quite slimy and frost damaged so had to be peeled down quite a bit but was still a good size.

I digress, back to my experiment with 'Garlic and Dill Pickle Sauerkraut'. Actually, it is a hack on a recipe I have tried from Farmhouse Culture. 
Pound and massage with Celtic sea salt
My complaints about purchasing their brand are... it is quite expensive and the kraut itself, although organic, flavorful with the addition of garlic, dill weed and slices of fermented dill pickles is soft, not crunchy... and I want to use my garden cabbage. Fast forward to this month, January 2019 and a few pictures of my progress on the second version.

Following the instructions in my 'E~Z Pickler Fermenting Kit', the cabbage is cleaned and cored. Several leaves are kept whole and cut in circles to fit on top of the cabbage once packed in the jars. I used a food processor to finely shred the cabbage. Layer shredded cabbage in a sturdy bowl and sprinkle with required amount of Celtic sea salt. Pound and massage the cabbage to release juice that will form the fermenting brine.
Weight & cover to form brine

Top the pounded cabbage with a plate and a heavy weight, I use a gallon jar filled with water. Cover with a towel for several hours or overnight to form a brine. DO NOT proceed until the brine is formed.

By the next day the brine should completely cover the cabbage. Remove the towel, weight and plate. Mix in any additional ingredients. In this case, for my Garlic and Dill Pickle hack; to 16 cups of cabbage, I added 1-1/2 tablespoons finely minced fresh, organic garlic and 1 cup packed minced, fresh organic dill weed. Pack cabbage mixture lightly into sterilized, cooled jars. Pour over brine. Arrange reserved leaf on top and seal with air tight fermenting lid.
Ferment at proper temperature

The jars in bowls, to accommodate overflow, were moved to the basement with a consistent temperature of 19C for 10 days.
On Day 11 the final ingredient was added... a quart of thinly sliced, 'Fermented Dill Pickles' from my 2018 garden. The cabbage and dill brine were added and mixed. Then the dill and cabbage mixture was packed into new, sterilized, cooled, quart and pint sealers. The reserved cabbage leaf placed on top again. Lids and seals were closed until just snug, not too tight.
Sally Rae's 'Garlic and Dill Pickle Sauerkraut' Hack


The jars of kraut are now ready for the fridge where they will continue to ferment at a slower rate. I will taste test the result few weeks ... if I can wait that long!

On another note, it's time to look through and order your seeds for 2019. Don't forget a few of my favorites from William Dam Seeds; Cassia Organic Zucchini, Corentine Cucumbers for Dill Pickles,
and Sunshine Squash.

Till next time ... Bon Appétit!


'E~Z Pickler' by Sally Rae
Photos by Sally Rae
'Garlic and Dill Pickle Sauerkraut' Hack Recipe by Sally Rae 

Saturday, October 21, 2017

Thai Sweet Potato Soup

Happy very Belated Thanksgiving! My computer was out of commission for a few weeks and I didn't realize how much I would miss it until it was gone! 

We had a wonderful Thanksgiving feast of Braised Lamb Shanks, a Double Smoked (half leg of) Ham, Lemon Olive Oil Roasted (home grown) Sweet Potatoes, Wilted Fresh (garden) Kale and Sweet Onions with Blackberry/Ginger Balsamic Vinegar, the last garden Zucchini stir fried with Mushrooms, Fermented Dill Pickles and Pickled Beets. We were already stuffed, so dessert was kept light with a Lemon Ricotta Cheesecake and Lemon Curd made in the Instant Pot

It's that time of year again, when grocery stores carry the super ginormous, orange fleshed sweet potato. Now that the holiday has passed, the prices have dropped, so if you have a cool storage area, now is the time to stock up. These huge tubers are great for dehydrated dog treats, soups and Sweet Potato Salad. I made a double batch of the recipe below for my freezer and look forward to it warming and nourishing us through the upcoming monsoon season! This recipe is easily converted to vegetarian by substituting vegetable stock and diced, cooked sweet potato instead of chicken... and omit the whipping cream.


THAI SWEET POTATO SOUP WITH CHICKEN         Yield: 8 servings
This soup is a great way to use those really huge sweet potatoes now available at low prices. It is easily converted to vegetarian by substituting vegetable stock and diced, cooked sweet potato instead of chicken and omit the whipping cream.


2 large sweet potatoes, peeled and diced (8-10 cups diced)
1 onion, diced

Thai Sweet Potato Soup with Chicken
3 cloves garlic, peeled and minced
1 generous Tbsp. organic coconut oil
1-1/2 Tbsp. freshly grated ginger
5-6 cups flavorful chicken stock
1/8-1/4 tsp. cayenne pepper
1 fresh lemongrass stalk
2 kefir lime leaves
salt and black pepper to taste
1 can (400 ml) unsweetened coconut milk
1/2-1 Tbsp. fresh lime juice, optional
1/2 cup whipping cream, optional
1-1/2 cups cooked, diced chicken meat...
       or cooked, diced sweet potato


In a large stock pot melt coconut oil over medium heat. Add the chopped onions, garlic and ginger. Sauté until softened and fragrant but do not brown. Clean the outer leaves then pound the bulb end of the lemongrass with a skillet or flat meat tenderizer. Add the chicken stock, cayenne, lemongrass, Kefir lime leaves, salt, pepper and diced sweet potato. Bring to a boil, reduce heat and simmer, partially covered for 20-30 minutes until the potatoes soften.

Remove the lemongrass and Kefir lime leaves. Use an immersion blender and purée the mixture until smooth. Add the coconut milk and bring back to a simmer, stirring often... do not boil!
Stir in the cream if using. Taste and adjust the seasoning if necessary with lime juice, powdered ginger, cayenne, salt and pepper.
Ladle soup into servings then divide the chicken meat equally to each serving.
  
Till next time... Bon Appétit!

Photo and recipe by Sally Rae 

Thursday, September 14, 2017

Delicious Breakfast

Perfect Soft-Boiled (Steamed) Eggs
Breakfast is the most important meal of the day and happens to be my favorite meal .... with brunch a close second!

Who doesn't love a soft boiled egg? I make them just to use the adorable, wooden egg cups that I've had for years. But getting the timing just right, so the white is set and the yolk still runny is tricky. I heard a new method for soft-boiled eggs from the folks at Cooks Illustrated. Actually, not boiled at all, but technically steamed! The end result is a more consistently perfect egg without the tendency for cracked shells which can result from placing them into boiling water.

PERFECT SOFT-BOILED (STEAMED) EGGS   Yield: 2 eggs    ... from Cooks Illustrated
The key is twofold: get your eggs quickly into the pot with the lid on and immediately set a timer. A digital timer is best or even a stop watch so that timing is accurate. If you are doing a lot of eggs at once, adjust the size of the pot or use a steam basket so all the eggs cook for the same amount of time. Also, be sure to use eggs that come straight from the fridge!

Bizarre Breaky but delicious and so colorful!
Brie cheese, green and red 'kraut, avocado and 2 perfect eggs


Ingredients:
2 cold eggs
salt and pepper for serving 

Instructions:
Fill a small pot with 1/2-inch of water. Turn the heat to medium-high and bring the water to a full boil. Quickly and gently, set the eggs in the pot and tightly cover with a lid. Immediately set a timer for 6-1/2 minutes, and continue to cook the eggs over medium-high heat.
As soon as the timer rings, put pot into the sink and run cold water over the eggs for 30 seconds to stop the cooking. Serve in egg cups if you have them.
Sally Rae's Breakfast Smoothie Ingredients
 
Smoothies are another one of my favorite 'breakfast to-go' items. I have a few beautiful, big, old-style milkshake glasses that are perfect for at home and work. For the ferry, a large yogurt container works just fine! Any extra is easy to store in the cooler for the day in town. When the container is empty, no need to worry about it getting broken or damaged.

BANANA AND STRAWBERRY SMOOTHIE   
        Yield: 1-2 servings
The 'Pepto-Bismal' color is from organic red beet crystals. All measurements are guesstimates, so the yield may vary.
Banana and Strawberry Smoothie

Ingredients:  
1 cup unsweetened almond milk or plain homemade kefir
1 ripe banana
1-2 Tbsp. organic red beet crystals  
1 Tbsp. hemp hearts
1 generous spoon organic cashew butter
1/2 cup frozen organic strawberries 

Place all ingredients into a blender and whirl on high speed until there are no lumps. Pour and serve.

**CHEF'S NOTE: there are so many variations to this guideline recipe... substitute Coconut Milk and Mango, Banana and Blueberry, add Greek yogurt, flax seed... endless possibilities for a nourishing, fast, to-go breakfast!!

Another idea if you're in a rush for work or heading to the ferry ...a slice of Banana Bread or 'Pumpkin Pecan Loaf' and a fresh coffee fills the breakfast bill. I always have overripe bananas in the freezer (does this sound familiar?) They are used to bake different versions of banana bread ...with or without nuts, gluten free, grain free etc. Once the loaves cool; slice and wrap individually, pack into a freezer zip lock bag that is labeled with the item, date then pop in the freezer. In the rush out the door or for a lunch box they are ready to go... maybe not the most nutritious breaky, but it's home baked, you know the ingredients and it's better than no breakfast at all!

Till next time... Bon Appétit!

Photos by Sally Rae
'Steamed Egg' Method from Cooks Illustrated
Smoothie Recipe by Sally Rae  

Tuesday, August 29, 2017

End of Summer and the Picking is Easy

It's hard to believe summer is almost over! Today is August 29th, and still very warm outside. I had to wait for the garden to be cloaked in late afternoon shade before heading out to water. While outside tonight until 7:30pm, the breeze was so warm it felt like July, what a treat!! That warm breeze also kept the mosquitoes from taking flight so I had a glorious time in the garden... picking, watering and feeding on fresh, warm strawberries.

Seascape strawberries ~  huge, flavorful and juicy
The second crop of Seascape strawberries are magnificent this year... huge, flavorful and juicy. We are very lucky to still have an excellent, abundant supply of high quality, potable water at this time of year. Many farmers and gardeners have suffered in this long, dry spell. Some are experiencing very low water supply and the need to make a choice on where that water is rationed. Livestock and animals are taking precedence over their gardens. It is sad to let the veggies go. As for flowers, well, as I always say... "if I can't eat it, I can't be bothered growing it!"
Big, beautiful berries!!
As the weeks pass by, I'm picking larger bowls of strawberries every 2-3 days. However, I've also noticed more berries are being damaged by a possible rodent in my garden. It's pretty hard to keep all of nature out in organic gardening, so we'll just have to share. The June crop is always ravaged by the robins and their young, along with slugs, wood bugs and other assorted pests. In August, the picking is easy and although a different clientele of pests, we get a descent sized bowl full. These days, more than what we can eat fresh, so a few actually make it to the freezer for winter smoothies.

Corentine cucumbers
The Corentine cucumbers are still producing well. The 12 plants are picked  every 2-3 days to keep the size about finger length. Today's harvest will be packed in a 2-quart jar with dill weed, garlic, pickling spice and a salt brine then topped with my 'E~Z Pickler' fermenting lid. After five days, of fermenting at 21 degrees Celsius, they will be ready for the fridge. 

I leave a few cucumbers on the vine to grow large enough for salad and slicing... or to scoop up hummus or salmon salad. Near the end of their season, I leave more cukes grow larger for one of my family's favorite pickles. They make great 'Aunt Stella's Pickles in a Pail', from my cookbook 'For the Love of Food' page 227.

With September and Back to School just days away, who knows how much longer these balmy days and nights will continue. We are due for rain ...and desperately need it... but for now I'm enjoying this lovely weather and easy, plentiful picking from the garden!

Till next time... Enjoy a safe, long weekend... Happy Gardening and Bon Appétit!


Photos by Sally Rae

Friday, August 25, 2017

Fermenting Dill Pickles

As we break records for the number of rain-free days, the Corentine cucumber plants have been producing well with dedicated watering. My 'E~Z Picklers' have been put into full production, with several jars fermenting at once. The extra fridge that I call my 'chocolate fridge', (because it was purchased to accommodate my Handmade Truffles), is now operating and filling fast with nine quarts ...so far... of half sour and full sour dill pickles. 'Half Sour' is a deli term referring to pickles in a brine of water and salt. With the 'E~Z Pickler', fermented, half sour dill pickles are easily transformed into 'Full Sours' by adding a small, measured amount of apple cider vinegar AFTER fermentation.
E~Z Pickler, fermenting dills
Lacto-fermented or brined pickles are made at room temperature using raw vegetables and just a saltwater brine. They are not preserved by cooking or canning. There is no need for a culture or starter because a spontaneous fermentation is created by beneficial lactic acid microbes that live on the produce. This is also known as fresh cultured, and lacto-fermented vegetables are self-preserving. After a few days of fermenting at a comfortable room temperature, they only need refrigeration. When pickling is complete, they are still raw, but have transformed into a more digestible food that stays fresh for months in the refrigerator.

Brine Pickling Basics with the 'E~Z Pickler' 
Follow the directions exactly and don't reduce amounts of salt. Don't make dill pickles as your first attempt. We all have a memory of these classic pickles but they were most likely canned in a hot vinegar solution. Fresh brine pickles have a sour taste without vinegar and don't contain additives to make the cucumbers stay crisp. First become successful and familiar with pickling firm vegetables like cauliflower, carrots and daikon radish. 
After a few batches, you can move to cucumbers which need a more practiced skill level.
~ Use filtered water; chlorine, soft or hard water may affect culture 
~ Use unrefined, mineral sea salt - do not use table, pickling or kosher style salt 
~ Use fresh vegetables; organic or untreated, locally grown and in season are best
The first few quarts, ready for the fridge
Storing Finished Pickles 
Once the pickles are finished fermenting at room temperature, store them in the refrigerator. These are not shelf stable pickles. Remove the fermenting lid assembly and separator cup then store in glass jars with the 2-piece snap lid; screw on, then slightly loosen. Mark the date on each jar. Pickles continue to ferment in the fridge at a slower rate. Brine pickles stay fresh in the fridge for 4-9 months... if they last that long!!

After you've eaten all the pickles use the brine in salad dressings or to make lightly pickled vegetables. I have heard the brine called the 'new Gatorade', rich in probiotics and electrolytes. I am not suggesting drinking a large amount but a little shot of chilled brine on a hot day is very refreshing!

I've had a great time at the Denman Island Saturday Farmer's Market this summer. Chatting with and meeting many food enthusiasts from around our province and some from as far away as Australia, Ireland and Germany to name a few. I welcome you to my Blog and look forward to comments and feedback from the new owners of my 'E~Z Pickler'!
 
Till next time... Happy Fermenting and Bon Appétit!


Photos by Sally Rae

Saturday, July 22, 2017

Denman Island Saturday Market 2017

Denman Island Farmer's Market
The Victoria Day long weekend, Saturday May 20th, marked the opening of the 2017 season of the Denman Island Saturday Farmer's Market. It was a chilly day for May but there were a good number of vendors happy to kick off the season and share the weekend with the 30th annual Denman Island Pottery Studio Tour. 

The weather has not been cooperating so far this year... rainy and cool then a short heat wave has pushed some of the vegetables to bolt in complete confusion. Everything in my garden is about six weeks behind 'normal'. The garlic scapes were picked several weeks ago and I have pulled a few garlic heads to check their progression. I'm disappointed with their small size, so will leave them in the garden an additional six weeks past my 'normal' timing. The heat loving plants... tomatoes, winter squash and pickling cukes are struggling and still look pathetic and small. I had them covered with plastic cloches until the weather warmed, then had to shade them with perforated plant trays as in years past... but now it is cool again. Not much we can do but keep riding our West Coast weather roller coaster!
Cucumbers and Kohlrabi
E~Z Pickler with glass weight
I've been ecstatic to finally have fermented dill pickles in the fridge again! Although the Corentine pickling cucumber plants are small, I have picked three times already. The first two pickings were small, so the jars had to be topped up with cauliflower or kohlrabi, which are both delicious dilled. Finally, this week's harvest produced enough for a full quart of Garlic Dill Pickles in my 'E~Z Pickler' Single Jar Fermenting Kit. I have 12 Corentine pickling cucumber plants in the main garden this year, so when the weather warms, I look forward to a huge weekly harvest to ferment. 
Since last summer, I've been using a glass weight and glass separator cup in the fermenting jars. In the photo to the right, with just cucumbers, you can see the thick, glass weight in the top of the jar, holding the vegetables below the brine. The weights are especially helpful with sauerkraut.
Denman Island Saturday Market  2017
Look for me at the Denman Island Saturday Farmer's Market through the summer. At my table you will find; my 'E~Z Pickler' Single Jar Fermenting Kit, fermenting accessories (the glass weight and glass separator cup), my cookbook 'For the Love of Food' and my packaged line including; 'Rainbow Lentil Soup Mix', 'Curried Rice Mix', 'BBQ Dry Rub' and my signature 'Garlic Seasoned Pepper'. Stop by and enjoy a sample of crunchy, fermented vegetables that change weekly... cauliflower, kohlrabi, daikon radish or possibly even dilled cucumbers if they last that long! 
Hope to see you at the Market! 

Till next time... Happy Gardening and Bon Appétit!


Photos by Sally Rae

Saturday, May 13, 2017

Kohlrabi De-mystified

Small bulbs should feel heavy in your hand
Kohlrabi is a strange, sputnik-looking vegetable that is a member of the cruciferae family. This family of vegetables includes; broccoli, cabbage, turnips, mustards and their many relatives. It is a common Canadian garden crop, but commercially is almost limited to local Farmer's Markets.

Kohlrabi is a popular European specialty, known by many names including; German turnip, stem turnip and cabbage turnip. The above ground stem forms a bulbous growth, either round or flattened globe in shape. The thick skin is either pale green or purple. The inside flesh of both are the same off white color and there is no flavor variance. The taste and texture are similar to broccoli stem or cabbage heart but milder and sweeter with a higher ratio of flesh to skin. The fibrous outer layers are peeled away prior to cooking or serving raw. The leaves are also edible and can be used as collard greens or kale. 
In the garden

Kohlrabi is easy to grow, it is a cool season crop that likes full sun. Start seeds indoors from early spring to mid summer for a continual harvest. Planting in mid July to early August provides a fall and winter crop. Or, direct seed when the soil warms up... plant 1/4" deep, with plants spaced 4-6" apart and rows 12-18" apart. Kohlrabi is a moderate feeder and will tolerate a broad range of soil but prefers sandy loam. For a sweet, tender harvest, pick when they are about 2-3 inches in diameter. Fall crops can be picked larger and still remain tender. Kohlrabi is frost hardy in the garden. To prevent disease, practice crop rotation. Avoid planting brassicas in the same location more than once every four years. Pests include flea beetles and cabbage worms.  

At the market, seek out bulbs that still have their leaves intact, it is a good indicator of freshness and that it was harvested recently. The bulb should be enclosed with skin that is firm and tight. The smaller the bulb, the sweeter the kohlrabi and it should be heavy in your hand. To store; separate the leaves from the bulb, store both in the fridge. The leaves in a sealed zip lock bag should be used with in a few days. Store the unpeeled bulbs loose for up to a few weeks.
Fermenting with dilled cukes

Kohlrabi is tasty either raw or cooked. Always peel the bulb using a sharp knife. The fibrous outside layer does not break down when cooked and is too thick for a vegetable peeler. 

It is a tasty addition to salads and is wonderful as the main ingredient in my slaw recipe below. It is crunchy, delicious and healthy when fermented in my 'E~Z Pickler', sliced in thin rounds or julienne  strips. To cook, treat kohlrabi as any other root vegetable; chop and roast it until tender or add to soups and stews. To cook the greens; gently sauté the chopped stems and greens in a little olive oil and garlic.    

KOHLRABI AND APPLE SLAW             Yield: 4 servings
A crunchy, juicy, crisp slaw that gets better by the second day. If you are not comfortable with knife skills to julienne the kohlrabi and apple, use a mandoline or coarsely grate.


Peel and cut in julienne strips
Dressing:
3 Tbsp. apple cider vinegar 
2 Tbsp. honey 
2 tsp. Dijon mustard 
1/4 tsp. sea salt 
Freshly ground black pepper 
3 Tbsp. grape seed oil
1/3 cup diced red onion
Salad:
2 kohlrabi bulbs, peeled and cut in julienne strips 
1 apple, peeled, cored and cut into julienne strips 
1 Tbsp. roughly chopped parsley 

Place all dressing ingredients into a jar with a tight fitting lid and shake well to emulsify. Set aside for at least 10 minutes, taste and adjust seasoning. Meanwhile, peel and cut the kohlrabi and apple. 
Place cut apple strips immediately in a bowl, add dressing, toss gently to thoroughly coat all the pieces. This will prevent the apple from oxidizing and turning brown. Add kohlrabi strips and parsley. Gently mix, set aside for 15 minutes.
Crunchy Kohlrabi and Apple Slaw
*CHEF'S NOTE: If cut in julienne strips, this salad will remain crunchy for 3-4 days... however, the color of the onion will dilute from the vinegar. 

Till next time... Happy Gardening and Bon Appétit!

Recipe by Sally Rae
'E~Z Pickler' by Sally Rae
Photos by Sally Rae