Showing posts with label Cooking Techniques. Show all posts

Thursday, June 9, 2022

What is Quinoa?

Organic Quinoa: Ivory, Red & White, Tri-Color

'Quinoa' (pronounced keen-waa) was a staple in the diet of the ancient Incas. It is a whole grain that is now rapidly growing in popularity due to its many health benefits.  

Quinoa is a flowering plant of the amaranth family. It is an annual plant grown as a crop primarily for its edible seeds. Though technically a seed, Quinoa is classified as a whole grain and is a good source of plant protein and fiber. It is a gluten-free, whole grain carbohydrate, as well as a whole protein, meaning it contains all nine essential amino acids. Quinoa cooks up much faster than other grains and when cooked the seeds expand rapidly, become tender but chewy and expel spirals that give a slight crunch. Cooked Quinoa becomes light, fluffy and nutty; the ideal canvas to showcase intense flavors, rich textures and your favorite veg, meats, dressings and sauces. Plus it provides 8 grams of protein, 5 grams of fiber and 220 calories per every 1 cup cooked. Over all it has 3-4 times more nutrients than brown rice. It is light and fluffy in texture but has the 'whole grain' ability to fill you up.

It comes in different varieties with different colors as well ... with white, red and black being most common. Most stores carry the common white quinoa but I found the color mixtures also available in a mix of red and white and a mixture of three colors at our local grocery stores. 

  • White Quinoa is the most readily available and is labeled simply Quinoa or sometimes Ivory Quinoa. It is very light and fluffy and the least bitter of the three. 
  • Red Quinoa tastes like white but when cooked remains slightly more al dente, therefore has a bit more chewy texture and holds its shape better in cold salads.
  • Black Quinoa is harder to find but like red quinoa maintains its shape better than white when cooked and it tastes nuttier.
  • Tri-Color Quinoa as the name suggests is a mixture of white, red and black into one bag.

Quinoa has a bitter, unappetizing coating called 'saponin' which occurs naturally as it grows to protect it from being eaten by wildlife. There is an easy 'fix' to removing this bitter, soapy flavor of the saponin coating ... by rinsing the quinoa grains thoroughly in cold water before cooking in any method. To do this, use a fine mesh sieve so you don't lose any of the tiny grains down the drain. Let the cold water run over the grains shaking the sieve and using your hand to move them around so all the grains get a good rinse.

Stove-top Quinoa with Curry
How to Cook Stove-top Quinoa - rinse the quinoa thoroughly. The basic ratio is 2 cups liquid to 1 cup quinoa. You can use water with a bit of salt, dry white wine or broth for flavor. Add liquid to the pot then add the rinsed quinoa. Turn the heat to high and bring the liquid to a boil, then turn down the heat, cover the pot and simmer gently for 15-20 minutes. The liquid should be absorbed and the quinoa will have sprung little spirals which is the germ of the kernel indicating it is done. Remove from the heat and give it a fluff with a fork to loosen it up. Then cover the pot and let it sit for another 2 minutes. At this point, you can serve it hot or spread it out on a bake sheet to cool for salads or wraps.

How to Cook Quinoa in a Rice Cooker - rinse the quinoa thoroughly. Grease the inside of the rice cooker with butter or cooking spray. Add 2 cups liquid to 1 cup quinoa and turn the rice cooker to the white rice setting. When the rice cooker lets you know the cycle is complete, open it and fluff the quinoa with a fork. Unlike rice the quinoa cannot remain in the rice cooker on 'keep warm', it will go mushy. So, remove the cooked quinoa from the rice cooker right away.

How to Cook Quinoa in an Instant Pot - *NOTE: this method is the exception and uses equal portions of liquid to quinoa. Rinse the quinoa thoroughly. Grease the inside of the IP with butter or cooking spray. Add quinoa and liquid in the ratio of 1 cup liquid to 1 cup quinoa. Close and lock the lid, set the cook time for 1 minute. Allow the steam to release naturally. Open the IP, fluff the quinoa and remove from the IP right away.

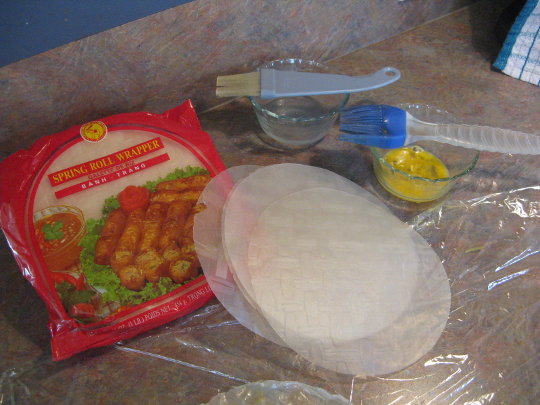
Curried Quinoa Wraps
Using quinoa as the base in any grain bowl gives the dish extra protein, extra flavor and texture. It is quick to whip up as a side dish and absorbs flavors of any meat, vegetables or sauces. Try the Tri-Color Quinoa in salads, wraps or lettuce cups ... it adds a bit more chewiness, color and absorbs the dressing so it is in every bite.

Until next time ... Bon Appétit!

Photos by Sally Rae
Cooking method research from The Food Network

Saturday, January 13, 2018

Vietnamese Grilled Lemongrass Chicken

About 15 years ago near Aldergrove BC, I was served the most incredible 'Vietnamese Grilled Lemongrass Chicken with Broken Rice'. The tiny restaurant, at a gas station on the Fraser Highway, was run by a mother and daughter. I have searched for years to find a reasonable facsimile to their incredible recipe with no success and much disappointment. 
Four years ago I decided to try my hand at replicating their flavors and method. My version below is very close but not the perfection that I remember.

Grill over medium-high heat
Pork can be used as a substitute but my preference is boneless, skinless chicken thigh meat. If you are not familiar with Lemongrass, review my previous post 'Lemongrass Questions Answered'. I would suggest using only fresh lemongrass for this recipe. 

Another ingredient that may need clarifying is 'Ponzu Sauce'. I was introduced to this incredible sauce in Hawaii and it has been a staple in my house ever since. Ponzu Sauce is a classic Japanese citrus sauce most commonly served with soy included. It can be purchased in most grocery stores, found in the same aisle as soy sauce or there are recipes on line to make your own.


VIETNAMESE GRILLED LEMONGRASS CHICKEN      Yield: 3-4 servings
Chicken thighs are the perfect protein for this dish as they remain moist when grilled, pork can be used as a substitute. This recipe can easily be doubled.

1 lb. (6-8 pieces) boneless, skinless chicken thighs 

Serve over steamed rice

Marinade:

2 Tbsp. golden sugar 
2 Tbsp. diced onion
3 Tbsp. finely chopped fresh lemongrass (1 stalk)
1 Tbsp. chopped garlic  
1/4 tsp. coarse black pepper
1 tsp. dark soy sauce
1 1/2 tsp. Ponzu Sauce
1 Tbsp. fish sauce
1 Tbsp. grape seed oil
With a meat mallet, pound the chicken until thin but not falling apart. Set aside.
Put the sugar, onion, garlic and lemongrass into an electric mini chopper and process to a fine texture. (Or, mince the garlic, shallot, and lemongrass individually, put them into a bowl, and add the sugar.) Add the pepper, soy sauce, fish sauce, and oil and process to combine well. Aim for a relatively smooth texture. The marinade will be chocolate brown. Transfer to a bowl. 

Into an 8x8" glass dish, spread a small amount of the marinade to coat the bottom. Lay a single layer of pounded chicken pieces, spoon marinade on the chicken and keep layering chicken and marinade to cover all sides of the meat well. Cover the dish and refrigerate to marinate at least 8 hours or up to 24 hours. Let the meat sit out at room temperature for 30-45 minutes to remove some of the chill before grilling. 

Preheat a grill to medium-high. Grill for 5 to 8 minutes, turning frequently, until cooked through. Keep a close watch, it will burn easily. Transfer to a plate, loosely cover with foil before serving. If serving with chop sticks, the chicken can be sliced into strips.
Serve with rice and stir-fried or grilled vegetables. 

Traditionally, this meal is served with steamed rice, fresh shredded lettuce, fresh cucumber, tomato and beansprouts.

Till next time ... Bon Appétit!

Recipe by Sally Rae
Photos by Sally Rae 

Thursday, September 14, 2017

Delicious Breakfast

Perfect Soft-Boiled (Steamed) Eggs
Breakfast is the most important meal of the day and happens to be my favorite meal .... with brunch a close second!

Who doesn't love a soft boiled egg? I make them just to use the adorable, wooden egg cups that I've had for years. But getting the timing just right, so the white is set and the yolk still runny is tricky. I heard a new method for soft-boiled eggs from the folks at Cooks Illustrated. Actually, not boiled at all, but technically steamed! The end result is a more consistently perfect egg without the tendency for cracked shells which can result from placing them into boiling water.

PERFECT SOFT-BOILED (STEAMED) EGGS   Yield: 2 eggs    ... from Cooks Illustrated
The key is twofold: get your eggs quickly into the pot with the lid on and immediately set a timer. A digital timer is best or even a stop watch so that timing is accurate. If you are doing a lot of eggs at once, adjust the size of the pot or use a steam basket so all the eggs cook for the same amount of time. Also, be sure to use eggs that come straight from the fridge!

Bizarre Breaky but delicious and so colorful!
Brie cheese, green and red 'kraut, avocado and 2 perfect eggs


Ingredients:
2 cold eggs
salt and pepper for serving 

Instructions:
Fill a small pot with 1/2-inch of water. Turn the heat to medium-high and bring the water to a full boil. Quickly and gently, set the eggs in the pot and tightly cover with a lid. Immediately set a timer for 6-1/2 minutes, and continue to cook the eggs over medium-high heat.
As soon as the timer rings, put pot into the sink and run cold water over the eggs for 30 seconds to stop the cooking. Serve in egg cups if you have them.
Sally Rae's Breakfast Smoothie Ingredients
 
Smoothies are another one of my favorite 'breakfast to-go' items. I have a few beautiful, big, old-style milkshake glasses that are perfect for at home and work. For the ferry, a large yogurt container works just fine! Any extra is easy to store in the cooler for the day in town. When the container is empty, no need to worry about it getting broken or damaged.

BANANA AND STRAWBERRY SMOOTHIE   
        Yield: 1-2 servings
The 'Pepto-Bismal' color is from organic red beet crystals. All measurements are guesstimates, so the yield may vary.
Banana and Strawberry Smoothie

Ingredients:  
1 cup unsweetened almond milk or plain homemade kefir
1 ripe banana
1-2 Tbsp. organic red beet crystals  
1 Tbsp. hemp hearts
1 generous spoon organic cashew butter
1/2 cup frozen organic strawberries 

Place all ingredients into a blender and whirl on high speed until there are no lumps. Pour and serve.

**CHEF'S NOTE: there are so many variations to this guideline recipe... substitute Coconut Milk and Mango, Banana and Blueberry, add Greek yogurt, flax seed... endless possibilities for a nourishing, fast, to-go breakfast!!

Another idea if you're in a rush for work or heading to the ferry ...a slice of Banana Bread or 'Pumpkin Pecan Loaf' and a fresh coffee fills the breakfast bill. I always have overripe bananas in the freezer (does this sound familiar?) They are used to bake different versions of banana bread ...with or without nuts, gluten free, grain free etc. Once the loaves cool; slice and wrap individually, pack into a freezer zip lock bag that is labeled with the item, date then pop in the freezer. In the rush out the door or for a lunch box they are ready to go... maybe not the most nutritious breaky, but it's home baked, you know the ingredients and it's better than no breakfast at all!

Till next time... Bon Appétit!

Photos by Sally Rae
'Steamed Egg' Method from Cooks Illustrated
Smoothie Recipe by Sally Rae  

Wednesday, March 8, 2017

Hand Pulled Noodles

I love noodles! A Google search proves there are many different methods and styles of pulling Asian noodles. When the opportunity arose for me to watch and learn, one-on-one, how to 'hand pull noodles', I jumped at it!! 

I was honored to meet a mother and daughter from TAIYUAN, in Northern China. These noodles are a common meal in their home, to me it's an incredible culinary art. I was thrilled to watch, practice and ask questions in person, first hand... an opportunity of a lifetime for me! 
Roll, rest and ready to start
Cut, keeping one end intact

The dough, made from a special high gluten flour, water and salt, takes time to knead and rest so was already prepared and ready to roll and cut. We were told the knife they use is twice the size we had available and the board they use is four times the size of ours, so she had to compromise and downsize her method.

The soft, supple dough was rolled with a special wooden rolling pin. The end cut was removed and set aside. Then noodle cuts were made, keeping one end intact. I was instructed, (and did not perfect) a quick, strong, flick of the knife blade at the end of each cut. This flick turned the cut edge of the dough upwards, so it could be floured and the noodles would not stick together. Once the strips were cut and floured, they were rolled over each other into a rope. Wrists are crossed so when the rope is picked up it is twisted again. 

It was amazing how strong the dough was, yet soft and pliable. Once the rolled rope is picked up and twisted, it is gently stretched while pounding on the floured board. I was timid to break the noodles but was assisted to spread my arms further apart to stretch the dough thinner. As I became more confident, the noodles were doubled over and then pulled and pounded more.

A wok of boiling water was kept on the stove. Once pulled and ready, the noodles were immediately lowered into the boiling water. The connected end of dough was pinched off at this point. Once in the boiling water, the noodles were stirred with chop sticks. When the noodles were floating near the top of the boiling water, they were ready to be removed and served fresh and hot.
The left over, made into 'cats ears'

Into the wok
The left over 'scraps' of dough were not wasted. They were gathered together and gently kneaded. Then cut into small pieces and rolled under the thumb almost like a tiny gnocchi. They translate to 'cats ears', and were also cooked in boiling water until they float. Then served with the same toppings.

Before the noodles were made, two toppings had been prepared; one of egg and tomato, slightly sweetened with sugar, and a stir fry of prawns, mushrooms, potato, red onion, broccoli, cabbage, tofu and a special sauce brought from China, that had a kick of heat. As the noodles were ready, they were portioned into bowls, topped with the sauces and enjoyed by all of us. By that time I was so interested in eating, I forgot to take photos!! The noodles had a chewy, substantial texture and the topping accompaniments, fresh, flavorful and delicious.
Several days later, I still reflect on this incredible experience and hope to make an attempt to replicate it at home.

Till next time... Bon Appétit!

Photos by Sally Rae

Saturday, February 18, 2017

Navy Bean and Smoked Sausage Soup

After seven days of snow storms and between power outages, I found the time to cook up a batch of hearty bean soup in the Instant Pot. Instant Pot instructions for dried beans state; "Dried beans double in volume and weight after soaking or cooking. To avoid overflow, please do not fill the inner pot more than half  capacity to allow for expansion." This recipe filled the inner pot to above the half mark but the beans had been soaked overnight and had already doubled in volume... everything went fine. There is another advantage to soaking the beans for at least eight hours; it speeds up the cooking process... and oh yes, it also reduces their gassy, 'tooting' effect! If you don't have a pressure cooker or Instant Pot, not to worry, this recipe can also be made on the stove top but the beans will take a bit longer to cook.

NAVY BEAN SOUP WITH SMOKED FARMER'S SAUSAGE           Yield: 8-10 servings
A hearty soup with added smoke flavor from the sausage and smoked paprika.
 
1-1/2 cups dry navy beans, soak over night
Fast, filling, bean soup in the Instant Pot
1 Tbsp. bacon fat or oil 
1 cup diced onion
1 cup diced carrot
1 cup diced celery 
3 cloves garlic, minced
1 lb. smoked Farmer's Sausage, sliced
1/2 tsp. Pimentón, smoked paprika
2 tsp. Worcestershire sauce 
2 large bay leaves, each broken into 3-4 pieces
2 tsp. dried oregano leaves
2 tsp. dried thyme leaves
1 tsp. dried sweet marjoram leaves
1-2 tsp. sea salt 
     OR 2 Tbsp. chicken soup base powder 
1/2 tsp. freshly ground black pepper
7-8 cups flavorful chicken stock
2 Tbsp. roughly minced parsley, for garnish

Drain the soaking liquid from the beans, pick through and remove any stones or foreign matter. Rinse beans and set aside. Heat bacon fat in the inner stainless steel pot with Instant Pot 'Saute' function. Add onions, carrot and celery; saute until the onions start to brown. Add the garlic, sausage, Pimentón, Worcestershire, bay leaves, oregano, thyme, marjoram, salt and pepper; stir and saute for a few minutes. Add the stock and beans, stir well.
Lock the lid in place, position the steam release to 'Sealing' and set the Instant Pot on high for 20-30 minutes. When the time is up, allow the pressure to come down naturally, about another 30 minutes.
When the steam pin drops, carefully remove the lid, tilting away from you. Remove the bay leaf and skim off any excess fat. You can mash some of the beans with a potato masher or just keep the soup as is. Taste and adjust seasoning. Serve hot with a sprinkle of minced parsley. 

Beat the winter blues with a steaming bowl of soup!
A fast, Instant Pot recipe for the family or freezer... great to take the chill off our unusual winter weather!

Till next time, stay warm and dry... Bon Appétit!

Recipe and photos by Sally Rae  

Saturday, January 21, 2017

Chinese New Year

Chinese New Year, also known as Spring Festival in China is the most important traditional holiday in China. The date for Chinese New Year changes each year, although it always falls between January 21st and February 20th. This year, January 28th begins the Year of the Rooster on the Chinese Calendar.

In the recipe below, Sambal Oelek is a chunky, ground, chili paste with no other flavors added. This provides the simple, pure taste of chilies. It does pack some heat, so add slowly and adjust to your taste. Sambal Oelek can be found in import shops, at Runge's Delicatessen in Courtenay and some grocery stores in the import aisle. For a substitute, try Sriracha, it is slightly sweeter with a touch of garlic but they are comparable in 'chili heat'. The other difference is the Sriracha is smooth and Sambal Oelek is a chunkier paste.

Indonesian Spring Rolls                  Yield: 24 small Spring Rolls 
For this recipe, use the small, 6-1/2" diameter rice papers, sometimes called Spring Roll Wrappers. These rolls should be prepared no more than 4 hours ahead of cooking. Store them covered in the fridge. They can also be frozen, uncooked, for up to 2 months.

24 dried rice paper wrappers (6-1/2" diameter)
Small, rice paper (Spring Roll) wrappers...
Brush one side with water the other side with egg.
1 egg, lightly beaten
water
2 pastry brushes
oil for deep frying

Filling: 
1 Tbsp. sesame oil
6 medium, dried shiitake mushrooms
2 carrots, cut into 1/2" long julienne strips
1/2 small suey choy (Chinese cabbage), finely shredded 
1 medium onion, cut into julienne strips 
1 clove garlic, minced 
1 Tbsp. cornstarch 
3/4 tsp. Sambal Oelek, or to taste
1 egg, beaten

Dipping Sauce: 
2 Tbsp. demerara sugar
2 Tbsp. rice vinegar
2 tsp. grated fresh ginger root
1-1/2 tsp. Sambal Oelek

Place dry shiitake mushrooms in a medium bowl and cover them with hot water. Cover the bowl and set it aside for 20 minutes. When the mushrooms have softened slightly, strain the liquid through a coffee filter or several layers of cheesecloth. Reserve 2 Tbsp. mushroom liquid for later in the recipe and the rest for stock, sauces, or discard. Remove the mushroom stems and discard. Cut the caps into thin julienne strips and set aside.
Assembly Step #1
Heat sesame oil in a large skillet. Add the onion and saute until soft, add the garlic and saute until the onion is golden but don't burn the garlic. Add the julienne cut shiitake mushrooms, carrots and shredded cabbage and the 2 Tbsp. reserved mushroom liquid. Stir fry the veg over medium-high heat, just until they are still crispy. Sprinkle over the cornstarch and mix in gently. Remove the skillet from the heat, add sambals, egg and mix well. Transfer mixture to a bowl and refrigerate until cool.
Assembly Step #2
While the filling cools, make the dipping sauce. Measure all ingredients into a small glass or plastic jar with a tight fitting lid. Cover the jar, shake vigorously and set aside. 
Preheat the oil for deep frying to 350F to 375F.

To assemble the Spring Rolls: 
Step #1- cover a clean work surface with plastic wrap. Place rice paper, on the plastic wrap and brush one side lightly with water, then turn the rice paper over and brush the other side with beaten egg. Let stand just until the rice paper softens. Place one tablespoon of cooled filling on each rice paper and fold over to just cover the filling. 
Assembly Step #3
Step #2- Fold the sides in and continue to roll up snugly. 
Deep fry until lightly browned
Step #3- Continue filling and rolling until all ingredients are used. Place finished rolls between layers of plastic wrap on a bakesheet. Cover with plastic wrap and a damp, not wet, cloth. 

Deep fry in preheated oil for about 3 minutes or until lightly browned. Drain on paper towels. Serve hot with dipping sauce. 

*CHEF'S NOTE: You can prepare and deep fry these rolls up to 6 hours prior to serving. Cool completely and cover them with plastic wrap. Store in the fridge until serving time. To serve, place in a preheated 375F oven for about 8-10 minutes or until hot throughout.
 
Indonesian Spring Rolls with Dipping Sauce

Till next time Kung Hei Fat Choi and Bon Appétit!

Recipe and Photos by Sally Rae